NEXT CLASS: AUGUST 28-30 • LIMITED SPOTS

Blog

How Thick is Granite Countertop
Blog

How Thick is Granite Countertop?

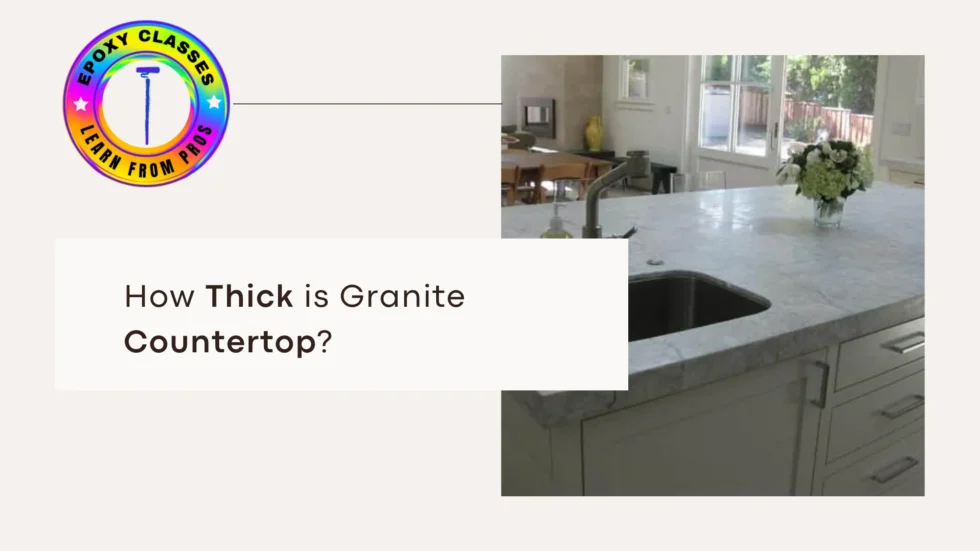
Granite countertops are the top choice for kitchens and bathrooms today. They provide durability, beauty, and lasting quality. When choosing your granite, thickness is key. It affects both how it looks and how well it works. So, how thick is granite countertop? Knowing this important measurement is crucial for a successful installation. It helps ensure your design matches the needed strength. Standard Granite Countertop Thickness Granite countertops come in various thicknesses to suit your needs. The best choice depends on your support needs and usage. Here are the top options for how thick is 3cm: 1. 1.2 cm Granite Countertops (¾ inch thick) This sleek granite countertop is perfect for bathroom vanities, fireplace surrounds, and walls. It’s a perfect pick where weight isn’t a concern. Here’s the catch: 2 cm granite requires extra plywood support for kitchen countertops. While it’s easier on the wallet, it may struggle in bustling spaces. Choose wisely! 2. 2.3 cm Granite Countertops (1 ¼ inch thick) Upgrade your kitchen with the ultimate countertop champion. Strong and sturdy, it stands tall on its own. Its luxurious look adds elegance and offers great crack and break resistance. Perfect for kitchen islands, stylish bars, and outdoor areas, it will impress everyone. 3. 3.4 cm+ Thick Granite Countertops (1 ½ inches or more) For style lovers seeking a bold, upscale statement, thick granite countertops of 4 cm or more are perfect. Made by layering two beautiful granite slabs, these surfaces radiate elegance. They are heavier and costlier, but they add a touch of luxury to any modern kitchen. Why Does Granite Thickness Matter? The thickness of granite matters. It affects durability, boosts appearance, and impacts installation. Choose carefully! 1.Strength and Durability Thicker granite slabs, like 3 cm, are stronger and resist cracking better than 2 cm granite. The 2 cm slabs need extra support. 2.Cost Considerations 2 cm granite is usually cheaper. However, it needs extra materials, like plywood backing. This can raise installation costs. 3 cm granite costs more at first, but it saves on labor costs and lasts a long time. 3.Aesthetic Appeal A durable countertop shows sophistication and strength. Thinner slabs, on the other hand, offer sleek elegance and modern style. Homeowners often select mitered edges to create an illusion of heft. This smart design adds visual depth without increasing weight. How Thick Is Granite for Countertops Compared to Other Materials? When you compare granite countertop thickness to other materials, here’s what you find: Granite countertops are thick, like quartz and marble. This gives them similar durability and choices for customization. The thickness of a granite countertop impacts its durability, appearance, and installation process. NIST offers guidelines for countertop sizes and material strength to ensure they last. For more details, visit. Standard Countertop Depth and Size Considerations When measuring kitchen counters, depth matters just as much as thickness. A standard depth balances functionality and comfort. Most countertops have a depth of 24 inches, with an overhang of 1 to 1.5 inches for added convenience. Kitchen islands and bar tops often extend 12 to 15 inches, providing plenty of seating space. Granite slabs typically measure between 105 and 120 inches long and 55 to 75 inches wide. This size offers an ideal canvas for creating large, seamless countertops. 3 cm vs. 2 cm Granite: Which One Should You Choose? If you’re unsure about your kitchen countertop’s thickness, here are the key differences between 3 cm and 2 cm granite countertops: Advantages of 3 cm Granite Advantages of 2 cm Granite The trend for modern countertops is 3 cm granite. This thickness provides a great mix of durability, style, and savings over time. How Does Granite Thickness Affect Installation? Choosing the right thickness for your granite slab is key. It ensures a smooth installation and lasting durability. If you choose thinner 2 cm slabs, remember to use plywood backing. This helps prevent bending and cracking, keeping your surface stable. On the other hand, 3 cm granite is heavier and can stand strong on its own, making installation easier. For slabs that are 4 cm or thicker, special methods are necessary. Their weight and size need expert care to ensure they look great in your space. The choice of granite countertop thickness also impacts edge profiling. Thicker slabs let you use more decorative edge styles. Thinner slabs have fewer options for edge designs. Final Thoughts: What Is the Best Granite Countertop Thickness? For granite countertops, 3 cm thickness is the top choice for homeowners. It offers great durability, strength, and beauty. For bathrooms or decorative uses, 2 cm granite is a budget-friendly option. Just remember, it needs extra support. On the other hand, 4 cm slabs exude luxury and elegance. However, they are pricier and harder to install. Epoxy Classes NY offers expert training for epoxy use on countertops, floors, and more. Their courses teach professionals and DIY fans to use epoxy coatings. This adds durability and style. Frequently Asked Questions (FAQs) What is the most common granite countertop thickness? Granite countertops usually have a strong thickness of 3 cm (1 ¼ inch). This balance of strength, style, and cost is perfect. It’s what every homeowner wants! Can I use 2 cm granite for my kitchen countertops? Sure! However, 2 cm granite requires plywood backing for added strength. This strong stone is often preferred in bathrooms and low-traffic areas. How thick is 3 cm granite compared to other materials? Our granite is 3 cm thick, which is 50% thicker than the 2 cm options. This extra thickness offers better durability and strong resistance to damage. It also matches the thickness of standard quartz and marble.

How to Remove Paint from the Concrete
Blog

How to Remove Paint from the Concrete?

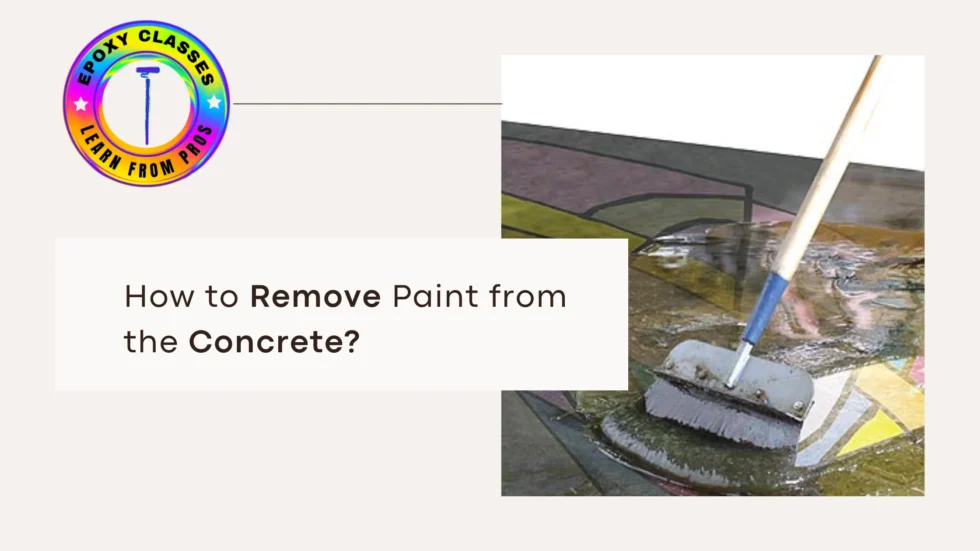
Removing paint from concrete can feel daunting. Concrete is porous, so paint seeps in and leaves stains. To restore that fresh look, paint removal is essential. This is true for both small spills and stubborn peeling. But don’t worry—many techniques are available! What is the best paint stripper for concrete? You can use chemical paint strippers, pressure washing, sanding, or natural options. The right method depends on the paint type, stain age, and condition of your concrete. Want to excel in concrete finishing? Check out Epoxy Classes NY for excellent training. They cover epoxy coatings, surface prep, and creative restoration methods. Why Is Paint So Difficult to Remove from Concrete? Concrete absorbs paint easily. When paint seeps in, it bonds tightly. This makes removing paint from concrete a long process. Paint on concrete removal is different from smooth surfaces like wood or tile. It needs both chemical and mechanical methods for the best results. How to Remove Paint from the Concrete? Best Methods for Removing Paint from Concrete   1. Using a Chemical Paint Stripper There are many methods for how to remove paint off concrete fully. Research commercial paint removers. That’s where the real secrets to success are. These strong formulas break down the paint’s structure. This makes it easy to remove. Lay the remover generously on the area. Allow it to sit for a span of at least 20 minutes. When the paint has softened, use a scraper or hard brush. With a soft hand, remove a layer of paint, just as an artist creates their masterpiece. Keep repeating the above process if the stains are obstinate. After you have rid the surface of the debris, proceed to clean water to rinse your surfaces. Your concrete will be shining and newly revamped! 2.  Power Washing for Paint Removal Transform your outdoor areas with a pressure washer. This powerful tool removes paint and dirt, making patios, sidewalks, and driveways look new. Using high-pressure water, it wipes away tough stains without needing harsh chemicals. Enjoy the charm of a fresh start! For great results, use a 3,000 PSI pressure washer. Keep a distance of 6 to 12 inches for the best reach. If some paint remains, a reliable paint remover can help. This guarantees a clean finish and a shining cleaning process. Power up your outdoor living space with a pressure washer. This machine is great for cleaning paint and dirt from patios, sidewalks, and driveways. It helps make your home look nice again. The device uses pure water at high pressure. This chips away at mold and lichen without needing toxic chemicals. Choose a 3,000 PSI pressure washer to achieve good outcomes. For the longest reach, hold the sprayer 6-12 inches away from the surface. You may use a paint remover if you have some paint left over. This gives a shining and durable look and a smooth cleaning process. 3.Scraping and Wire Brushing When tiny paint spills or light stains happen, act quickly. Roll up your sleeves and grab a putty knife or a sturdy wire brush. These tools can work wonders! Clean paint from concrete, use acetone or a special paint remover. This powerful solution dissolves paint easily, making scrubbing simple. It’s great for small messes, but larger jobs might require more effort. 4.Sanding and Grinding Ready to say goodbye to stubborn paint on concrete? It’s time to grind! A concrete grinder with a diamond cup wheel works wonders. This powerful tool transforms dingy garage floors, dull basements, and large industrial areas. But wait—dust will swirl around like confetti. So, put on your protective gear and make sure your workspace has good airflow. Natural Methods: Vinegar and Baking Soda If you are looking for an alternative way to clean your house, choose vinegar and baking soda as a homemade recipe. They act like wonders to help remove tough paint stains. Warm white vinegar easily removes water-based paint that has already dried. Remember the baking soda paste! Mix it with water and scrub it over the stained area. Not only will you find it very easy, but also the light paint will be removed virtually like something invisible. These methods are not as strong as the chemical strippers but if it comes to eco-friendliness, they are the best and also safe. They are suitable for those unfortunate spills that upset your tranquility. Removing Different Types of Paint from Concrete It’s high time to make those annoying stains from paint disappear! For fresh, water-based colorants (e.g. latex), use a warm, soapy soak and a strong, firm brush. You would only need a paint remover in case the stains have dried. Oil-based paints are more difficult to remove. Use of acetone, mineral spirits, or special paint strippers indeed. If you are dealing with garage floors or industrial places, prepare to go through layers of paint, such as the city skyline! For a spotless look, both grinding and chemical treatments should be used. Get ready for a fight with the stubborn stains! How to Remove Paint from a Garage Floor Garage floors often have epoxy or sealed concrete. This makes it harder to remove paint. A commercial paint stripper for sealed surfaces can remove paint safely. It won’t harm the base layer. Use a floor buffer with a scrubbing pad after applying the stripper. This helps loosen and remove the paint. Then, rinse the area with water. Government Guidelines on Paint Removal from Concrete When taking paint off concrete, always follow safety rules. This protects you from chemicals and helps the environment. The EPA and OSHA set rules for disposal and safety standards. For safety tips on paint removal and disposal, check the EPA and OSHA. Final Thoughts on How to Remove Paint from the Concrete Choosing the right method for paint removal from concrete takes skill. First, assess the size of the area. Next, consider the type of paint present. Lastly, check the tools you have. For larger projects, use chemical removers, pressure washing, or grinding. For stubborn small stains, vinegar and baking soda can be effective. Careful preparation and safety measures are key to

Best Epoxy Training Classes in New York
Blog

Best Epoxy Training Classes in New York

Epoxy flooring is the top choice for homes, businesses, and factories. It’s durable and beautiful. It needs little maintenance and looks great anywhere. If you’re a contractor wanting to grow, a business owner seeking flooring tips, or a DIY enthusiast ready for new projects, learning epoxy installation is a valuable skill. Are you looking for epoxy floor training or epoxy classes near me? Our New York program offers hands-on experience with experts. You’ll learn epoxy applications, coatings, and smart techniques. With our training, you’ll gain the skills to install beautiful, high-quality epoxy floors confidently. Why Learn Epoxy Flooring? Epoxy flooring goes beyond just pouring resin it’s an art form. Mastering this skill requires precision, knowledge, and practice. With the right training, a tough job can become a smooth masterpiece. Whether in busy commercial areas or stylish garages, epoxy flooring looks great everywhere. It resists stains, impacts, and chemicals, making it ideal for garages and warehouses. Business owners love its lasting elegance. With choices like marble epoxy and bold metallic finishes, you can enhance your space. Property owners enjoy the modern, upscale look it adds to any setting. Learning epoxy flooring is a smart career choice. The demand for it in New York City keeps rising. More businesses and homeowners pick epoxy instead of traditional floors. This trend makes trained professionals in high demand. What You’ll Learn in Our Epoxy Floor Classes in NYC Our epoxy flooring course offers a full learning experience. It covers all steps, from floor prep to finishing. In training, you will learn the importance of proper epoxy floor preparation, as this ensures the best adhesion and longevity of the epoxy. Learning epoxy floor coating techniques is important. We help you with mixing, applying, and curing to get a smooth, lasting finish. If you’re interested in garage epoxy floor installation, we provide specialized training. This will help you master a popular flooring service. Explore marble epoxy flooring with us. We teach advanced techniques for creating stunning decorative designs. Also, our training includes commercial and industrial epoxy flooring. You’ll learn about large-scale uses in warehouses, retail stores, and factories. Why Choose Our Epoxy Flooring New York Want epoxy training near you? Check out our New York programs! We offer hands-on learning with experienced instructors. Gain valuable business insights from real-world training. Our classes prepare you for projects with confidence. You’ll learn essential skills for success. Whether you’re a beginner or a pro, we have something to boost your craft! A key benefit of our program is hands-on experience. Working directly with epoxy materials increase both confidence and skills. Small class sizes mean personalized instruction. This ensures each student gets help suited to their skill level. We teach application techniques and share insights about the epoxy flooring business. This knowledge helps you start or grow your own epoxy flooring service. Epoxy Flooring NYC – A Growing Industry Demand for epoxy flooring in New York is growing. More businesses and homeowners want durable and attractive flooring choices. Many people want epoxy flooring in NYC or nearby. This shows there’s a demand for skilled professionals in the field. Learning epoxy flooring now puts you in a good spot to tap into this growing market. Join our epoxy flooring course. Learn skills to offer professional services in New York City and nearby areas. You’ll be ready for any job. This includes garage epoxy floors, industrial areas, and decorative finishes. Safety Importance When using epoxy flooring, follow safety rules. This keeps materials safe and protects everyone at work. OSHA gives guidelines for using epoxy coatings safely. They address ventilation needs and the use of personal protective equipment (PPE) to prevent harmful chemical exposure. For safety rules and best practices, check the OSHA website: OSHA Epoxy Safety Guidelines. Get Started with the Best Epoxy Training in New York Ready to start or boost your career in epoxy flooring? Join our epoxy training classes in NYC for the perfect learning experience. We emphasize hands-on training. This prepares you for real projects in residential and commercial areas. At Epoxy Classes NY, we teach the art of epoxy flooring. Learn epoxy techniques with expert help. Our program includes garage floors, industrial coatings, and decorative designs. Join us in New York for training. FAQs How long does an epoxy flooring course take? Epoxy flooring classes can last different lengths of time. Most programs, like ours in New York, provide intense training. You can finish these sessions in just a few days. This allows you to quickly gain practical skills and start applying epoxy professionally. Do I need prior experience to take an epoxy flooring course? No prior experience is required to enroll in our epoxy training classes near me. We offer courses for beginners and professionals. They help you improve your skills in epoxy floor installation. Where can I find epoxy floor classes near me? Looking for epoxy floor classes nearby? Our New York training program offers hands-on epoxy flooring courses. You’ll gain real-world skills and learn from experts. Join Epoxy Classes NY today and start your journey toward mastering epoxy flooring!

Can You Place Laminate Flooring Over Tile
Blog

Can You Place Laminate Flooring Over Tile

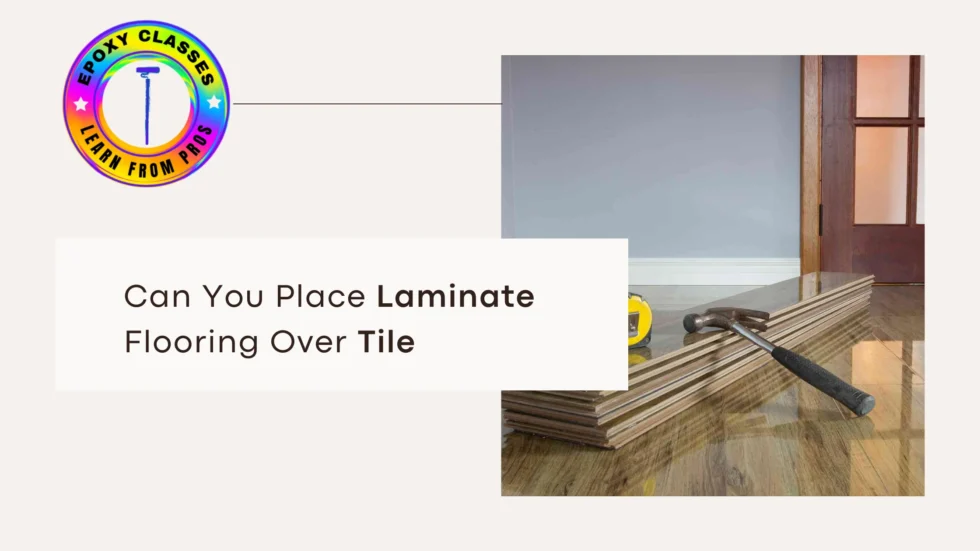
Want a transition from tile to laminate? Yes, you can place laminate right over that tile. This smart shortcut saves time, money, and hard work. This method is perfect to improving your home style or finding budget-friendly options. At Epoxy Classes NY, we help professionals gain essential skills. Learn to install floors, master epoxy coatings, and prepare surfaces accurately. Whether starting a new career or refining your skills, our hands-on training helps you succeed. Is It Possible to Install Laminate Flooring Over Tile? Transform your space by installing laminate flooring over existing tile. But don’t rush in. First, check your tile’s condition. Cracks, loose pieces, or uneven spots can cause problems. You need a flat, stable base for a good installation. Also, consider more than just the surface. Laminate over tile raises your floor’s height. This change may need careful transitions at doorways and room edges. Think about underlayment—it’s your secret weapon! It adds comfort, cuts down noise, and shields against moisture, especially in humid spots like bathrooms. Pros and Cons of Installing Laminate Over Tile One of the best benefits of choosing laminate over tile? No messy demolition! It’s a fast and affordable way to upgrade your floors. Laminate flooring also looks chic and modern, plus it needs little maintenance. But wait—some bumps may come your way. Floor leveling is a major concern. Uneven grout lines and raised tiles can shake stability. This instability can lead to future problems. Don’t worry! A leveling compound can fill those gaps and create a smoother base. Remember, laminate thickness can raise floor levels. Transition strips can help connect rooms. Preparing the Installing Laminate Flooring Over Tile Note that the tile surface is clean till it shines before you start your laminate project. Similarly, get rid of dirt, grease, and debris from your floor like a cleaning ninja. Patch up or replace any loose tiles to ensure the flawless end of your chore. For deep grout lines, use self-leveling compounds. They help create a smooth, flat surface. The key to underlayment choice is to choose the right one. Foot cushioning and noise reduction are features of foam or cork. Wet areas also get waterproof solutions of your choice for a quick battle with the moisture. Proper preparation of your laminate flooring will ensure it lays flat and lasts. Step-by-Step Guide to Installing Laminate Flooring Over Tile Step 1: Inspect & Prepare the Tile Floor Check the tile floor before adding laminate. Look for cracks, loose tiles, or uneven grout lines. Fill any gaps using a leveling compound or epoxy-based filler to create a smooth surface. Step 2: Choose the Right Underlayment Selecting the correct underlayment for tile floors is crucial. A foam or cork underlayment helps: For wet areas like bathrooms, use a waterproof underlayment. This will protect your tile laminate flooring from damage. Step 3: Measure & Cut the Laminate Flooring Using a laminate flooring calculator, determine how many planks you need. Mark and cut the planks to fit around corners, doorways, and fixed objects. Step 4: Begin Installing Laminate Over Tile Begin in one corner. Then, click the laminate planks together using the floating floor method. Maintain an expansion gap of at least 3/8 inches around walls and fixed structures. When using engineered wood over tile, use the snap-together flooring system for a snug fit. Step 5: Add Transition Strips & Finishing Touches For smooth transitions between rooms, install transition strips from tile to laminate. After securing all the planks, reattach the baseboards. You can also add quarter-round trim to cover any expansion gaps. Your new laminate floor over tile is now complete! Common Challenges and How to Overcome Them If your tile floor looks like a rollercoaster, use leveling compound. A good vapor barrier underlayment protects against water damage and mold in damp areas. Acoustic underlayment helps reduce noise. For homes with heating systems under the tile, pick laminate flooring that works well with heat. Not all laminates can handle warmth, so check the manufacturer’s specifications closely. Should You DIY or Hire a Professional? You can refresh your old floor by laying laminate right on top of the tiles. This will be your new DIY project! With the necessary tools and a little pre-planning, you’re good to go. If your tile floor isn’t even or if your precision is low, it’s better to hire a pro. If done properly, your new wooden floors will last a long time, avoiding costly repairs later. Final Thoughts: Is Laminate Over Tile a Good Idea? Laminate is the best way to change your area. No need to reinstall and have a great new appearance. The finished project, if done correctly, will be well leveled and ready for use. It’s advanced, tough, and at the same time, it’s economical. This was made possible by planning, utilizing the correct underlay, and fitting the components in just the right way. Ready to improve your flooring skills? Epoxy Classes NY provides expert training. Learn about epoxy floor coatings, surface preparation, and flooring installations. Join us and start mastering the trade today! FAQs About Installing Laminate Flooring Over Tile Can I lay laminate over tile without removing it? Yes! A tile must be in good condition. Cracks or loose pieces should be removed. Also, a level surface is crucial to avoid future flooring problems. Do I need an underlayment when installing laminate over tile? An underlayment is your flooring’s best friend. It cushions each step, reduces noise, and protects against moisture. For installation, foam or cork underlayment is the top choice. Will installing laminate over tile make my floor too high? Laying laminate over tile raises your floor’s height. This change may need door adjustments and smooth transitions between rooms.

How Much Does It Cost to Refinish Wood Floors
Blog

How Much Does It Cost to Refinish Wood Floors?

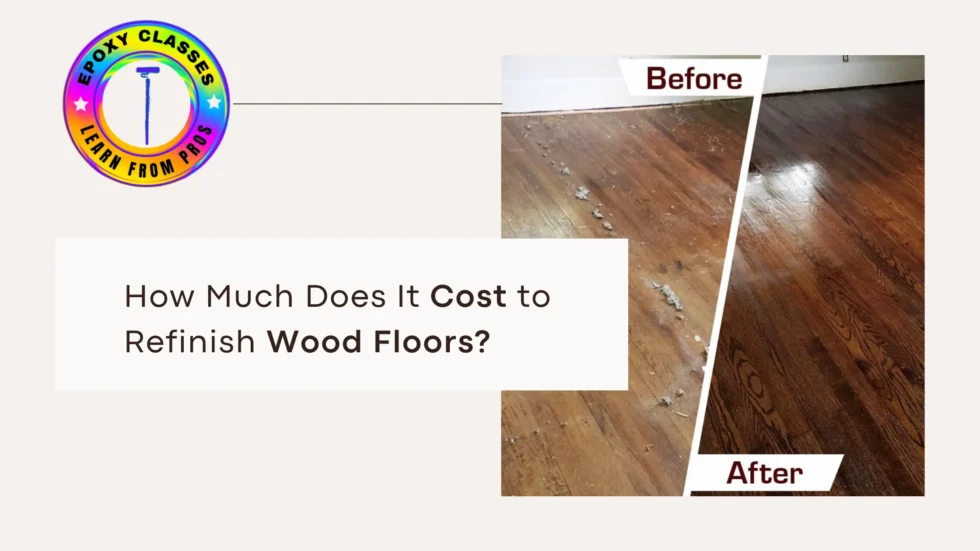
Wood floors add warmth and charm, making any home feel welcoming. However, over time, their shine can fade. Scratches, worn finishes, and color changes can diminish their beauty. But don’t worry! Refinishing your hardwood floors can restore their appeal without costing a fortune. Want to know how much does it cost to refinish wood floors? This guide will share all the details. At Epoxy Classes NY, we specialize in epoxy flooring. Our trainer guide you on this transformative journey. Dive into hands-on learning with real-world installation techniques. You’ll master preparing, resurfacing, and refinishing floors. This knowledge helps ambitious flooring pros grow. Elevate your business with skills that shine like polished epoxy! What Is Wood Floor Refinishing? Refinishing wood flooring begins by sanding the old finish. Once you have eliminated the flaws, you add a new coat of stain and sealant. This method allows you to pick up old floors and give them a new appearance without extra charge. Finishing and resurfacing are different. The latter method requires the replacement of the damaged planks. Yet, the former process involves renovating the real planks. The main factors, wood type, floor condition, and refinishing method, determine the total cost. We should discuss the cost drivers more. Cost to Refinish Wood Floors Refinishing hardwood floors typically costs $3 to $8 per square foot. This fee includes sanding, dyeing, and sealing. However, if repairs or extensive prep work are needed, the price can increase. For a 1,000-square-foot space, expect to spend $3,000 to $8,000 on professional refinishing. Cost Breakdown Per Square Foot Factors That Affect Refinishing Costs 1.Floor Condition If your floors have deep scratches, warping, or tough stains, they need extra care. You might need sanding or repairs, which can raise the cost of fixing your hardwood. Invest a little now to transform your floors. Worn wood can become stunning again. 2.Type of Hardwood Refinishing engineered hardwood flooring can cost more than solid hardwood. Why is that? The thin veneer layer is to blame. Some engineered floors can withstand only a few sandings before wearing out. 3.Stain and Finish Choice Darker stains can be tricky. They need extra prep work, which raises the cost to stain wood floors. High-gloss finishes also require more coats to keep their shine and durability. 4.Labor Costs Labor costs vary based on location and the floor refinishing companies you choose. Professional services ensure quality results but may cost more than DIY methods. 5.Additional Services Can Prefinished Wood Floors Be Refinished? Yes! Prefinished wood floors can be refinished, but the process is more complex. Hardwood sanding and refinishing costs can be higher. This is because it takes extra labor to remove the original factory finish. DIY vs. Professional Refinishing Homeowners often think about the cost of professional refinishing. DIY may seem budget-friendly, but it can lead to problems. Poor sanding or uneven staining can ruin your floors. Choosing experienced floor refinishing services ensures lasting results. Invest wisely, and enjoy beautiful floors. DIY Cost Estimates Professional Refinishing Cost For best results, hiring experts from floor refinishing companies is the safest choice. How Many Times Can You Sand a Wood Floor? Solid hardwood floors last a long time. They can be sanded 3 to 5 times during their life. In contrast, engineered hardwood flooring refinishing has challenges. The thin veneer layers can only handle sanding once or twice before they weaken. Final Thoughts: Is Refinishing Your Floors Worth It? Revamping your hardwood floors is a lucrative venture, which is rational as well as trendy. It adds to the aesthetic appeal, extends the life span, and also raises home value. Refinishing is a cost-efficient solution compared to installing the new ones. The prices are determined by the kind of stain you want, essential repairs, and the level of labor intensity. FAQs About Wood Floor Refinishing Can prefinished wood floors be refinished? Yes, the refinishing of prefinished wood floors is possible. Nonetheless, such a job could cost a lot more, and the process is more complex as a factory finish is already there. What is the difference between wood floor resurfacing vs. refinishing? Categories of wood floor repair are resurfacing and refinishing. Resurfacing is the replacement or repair of planks. Refinishing, on the other hand, means sanding and staining the floors you already have. In a word, refinishing is less expensive and mainly updates the floor’s appearance. How often should hardwood floors be refinished? Over time, refinishing should be repeated every 7-10 years if the floor is heavily used and gets lots of traffic. With the light finish of the engineered hardwoods, you have two refinishing options. In this case, just two applications might be enough. The veneer is thin, so it can’t hold the floor’s color well. How long does it take to refinish hardwood floors? This project will take about 3-5 days. It includes sanding, staining, and drying. If you use (non-)oil-based finishes, drying time will be shorter or longer.

What Does LVP Stand for in Flooring
Blog

What Does LVP Stand for in Flooring?

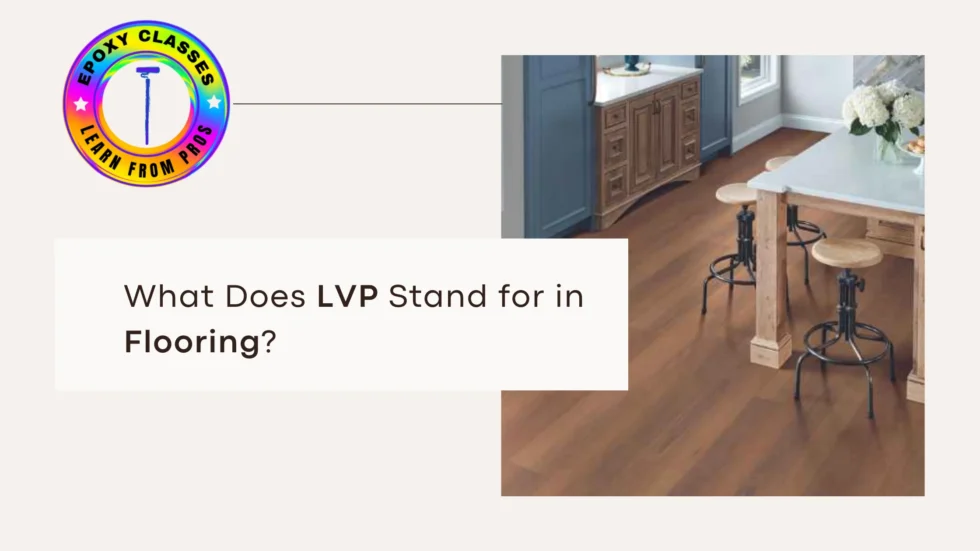
LVP flooring has become one of the most popular flooring choices for modern homes and businesses. But what does LVP stand for in flooring? LVP stands for Luxury Vinyl Plank, a high-performance, cost-effective, and stylish alternative to traditional hardwood floors. If you want a flooring that looks like real wood but is more water-resistant and durable, LVP flooring is a great choice. It’s versatile and practical. We will cover everything you need to know about what LVP flooring stands for, why it’s a great choice, its styles, benefits, and how it compares to other flooring types like UFS flooring and traditional hardwood. What is LVP Flooring? Understanding the Basics A common question people ask is, “What does LVP mean in flooring?” Simply put, LVP means flooring that is engineered to provide the appearance of real wood with the durability of vinyl. Unlike laminate or traditional hardwood, LVP wood is composed of multiple layers, including: Because of these layers, what LVP stands for in flooring is a long-lasting and resilient option for high-traffic areas. LVP vs. Vinyl vs. Hardwood: What’s the Difference? People often confuse what’s LVP flooring with standard vinyl flooring or hardwood. However, there are key differences between these options. Traditional vinyl flooring comes in large rolls and is usually glued down. It lacks the textured surface and plank design that makes LVP styles look and feel like real wood. What does LVP stand for in flooring? A higher-end alternative to traditional vinyl, offering durability, water resistance, and realistic wood textures. While hardwood is a timeless choice, it’s expensive and requires regular maintenance. LVP wood mimics the beauty of hardwood but is far more resistant to moisture, making it a better option for kitchens, bathrooms, and basements. Laminate flooring looks similar to LVP styles, but it is made from fiberboard, which can swell when exposed to water. LVP meaning flooring is completely waterproof, making it the better option for moisture-prone areas. If you’re wondering, “What is LVP stand for?”, the answer is clear—it’s the best mix of durability, aesthetics, and affordability. Benefits of LVP Flooring One of the main reasons homeowners choose LVP wood over other flooring types is its resistance to moisture. Unlike hardwood, which can warp and swell, what does LVP mean includes waterproof properties that make it ideal for kitchens, bathrooms, and laundry rooms. If you’re looking for a cost-effective flooring solution, LVP means flooring that gives you the beauty of hardwood at a fraction of the price. You can achieve the luxurious look of natural wood without the hefty cost. Most LVP styles feature a click-and-lock installation system, meaning even DIY enthusiasts can install it without professional help. No need for glue or nails—just snap the planks together and you’re done. What does LVP stand for in flooring? Easy maintenance. Unlike hardwood, which requires polishing and refinishing, LVP meaning flooring only requires regular sweeping and occasional mopping to keep it looking new. Because of its vinyl construction, LVP wood is softer and warmer underfoot compared to tile or hardwood. Some LVP styles also include built-in underlayment for extra cushioning and sound absorption. LVP Styles: Choosing the Perfect Look One of the best aspects of what LVP flooring meaning represents is its ability to match any aesthetic. Some popular LVP styles include: Wide planks give a rustic, farmhouse-style look, making them perfect for cozy, modern interiors. If you love the appearance of reclaimed wood, distressed or hand-scraped LVP wood provides a vintage charm with realistic grain textures. For a more contemporary feel, high-gloss LVP flooring meaning adds elegance, while matte finishes offer a sleek, understated look. Want a high-end designer look? What is lvp flooring mean? A flooring type that can be arranged in intricate patterns like herringbone for a sophisticated aesthetic.With so many options available, what LVP stands for in flooring is unlimited versatility in design. How to Install LVP Flooring Installing LVP wood is easier than you think. Here’s a step-by-step guide: Ensure the subfloor is clean, dry, and level before installing your LVP flooring meaning planks. Let your LVP styles sit in the room for 24-48 hours to adjust to temperature and humidity. Begin in one corner, snapping the planks together using a click-and-lock system. Make sure to stagger the seams for a natural look. Use a utility knife or flooring cutter to trim pieces for edges and corners. Once all planks are in place, install transition strips and baseboards for a finished look. LVP vs. UFS Flooring: Which One is Better? When comparing UFS flooring to LVP, it’s important to know how they differ. UFS flooring stands for Ultra-Flexible Surface flooring. It’s a newer, improved kind of vinyl flooring. While both offer durability and moisture resistance, LVP styles have a more rigid core, making them feel more like real wood. If you want a budget-friendly, easy-to-install option with a realistic wood look, what does LVP mean is the better choice. Final Thoughts: So, what does LVP flooring stand for? It stands for Luxury Vinyl Plank, a practical, stylish, and cost-effective flooring solution. Whether you’re renovating your home or upgrading a business space, LVP means flooring that offers the perfect balance of beauty and durability. At Epoxy Classes NY, we provide expert guidance on the best flooring solutions, from LVP wood to professional epoxy coatings. Want to learn more about flooring installation? Visit EpoxyClassesNY.com for top-notch training and resources. FAQs About LVP Flooring What is LVP flooring made of? LVP flooring has several layers. It includes a wear layer for protection. There’s a high-resolution vinyl layer that gives a realistic wood look. A rigid core adds stability, while a backing layer provides support and soundproofing. Is LVP flooring waterproof? Yes, LVP wood is completely waterproof. This makes it a great option for places that often get wet, like kitchens, bathrooms, and basements. How long does LVP flooring last? With proper care, LVP flooring can last 10 to 25 years. Its durability depends on the product’s quality and maintenance. Can LVP flooring be installed over existing floors? Yes, you can install LVP styles over many existing floors. This includes tile, concrete, and laminate. Just make sure the surface is clean, dry, and level.

Is Quartz Cheaper Than Granite
Blog

Is Quartz Cheaper Than Granite

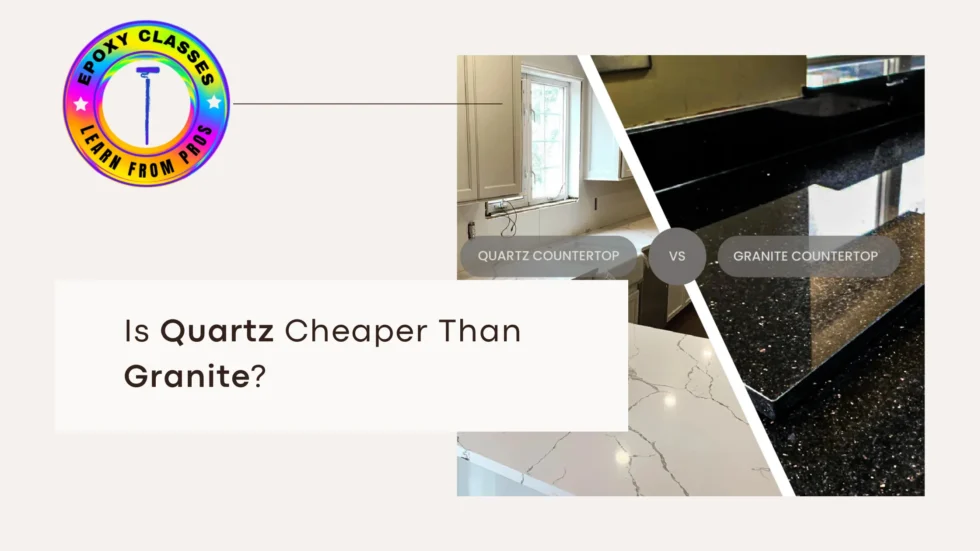
When choosing the best countertop for your kitchen, quartz and granite are popular options. Both materials are popular. They are beautiful and durable. They also enhance a kitchen’s look. However, one of the most common concerns homeowners have is the cost of new kitchen countertops. So, is quartz cheaper than granite, and which one offers the best value for your money? We’ll look at quartz countertop prices and installation costs. We’ll also compare these with granite prices. This way, you can make a smart choice. Quartz vs Granite: Pricing and Cost Breakdown Quartz countertops usually cost between $50 and $200 per square foot. Prices depend on quality, brand, and how complex the installation is. On the other hand, granite countertop prices generally fall between $40 and $100 per square foot. When it comes to pricing granite vs quartz, it’s clear that granite can often be less expensive. However, quartz is engineered to offer certain benefits that might make it worth the extra investment in some cases. One of the key factors in determining the cost of kitchen countertops is the material’s quality and availability. Granite, being a natural stone, has more price variation due to its sourcing. Some rare colors or types of granite can come with a higher price tag. Quartz countertops blend natural quartz with resins and pigments. They often provide more color and pattern consistency. However, they can be more expensive because of the manufacturing process. Installation Costs for Quartz and Granite Countertops Quartz countertops usually cost more to install than granite because of how they’re made. However, installation costs can greatly affect the total price. How much is it to install quartz countertops? Generally, installation for both materials will add about $20 to $60 per square foot. The cost to install quartz countertops can be higher. This is often due to the need for special equipment and more labor during installation. Granite needs professional installation. However, it can be easier to work with sometimes, which can lower installation costs. Granite countertops need sealing. This adds extra maintenance costs. Quartz countertops don’t need this. Granite maintenance costs can add up over time. So, quartz may be cheaper in the long run. This is especially true for those who want low-maintenance surfaces. Quartz Countertops: A Range of Beautiful Options Quartz has become popular lately because it comes in many colors and finishes. Rose quartz countertops have a beautiful, warm color. They are a great choice for creating a soft and elegant look in kitchens. Quartz gives you many color options. You can choose all white countertops, white and blue ones, or even deep, dramatic tones. Quartz, granite, and marble are popular choices. Each has its own unique qualities. In comparison, granite offers fewer color choices, but it’s known for its unique natural patterns that make each slab distinctive. If you are interested in a more organic, natural look, granite may be the best option for you. However, quartz is not only about aesthetics. It’s also about durability and longevity. Quartz is non-porous. This means it won’t stain or hold bacteria. Granite, on the other hand, needs sealing to resist stains. Quartz slabs have a more uniform look. Granite, on the other hand, has natural flaws and variations. Some homeowners love these unique features, but others may not prefer them. The Cheapest Countertops: Comparing Quartz, Granite, and Other Options Granite may seem like the cheapest option for countertops at first. Cheaper countertops might not save you money in the long run. This is especially true when you consider maintenance and durability. Granite usually needs resealing every year to keep its protective layer. In contrast, quartz countertops don’t need sealing. Quartz becomes cheaper over time. This is especially true when you think about the time and effort needed for maintenance. Consider clearance countertops or discounted materials if you’re on a budget. You can choose from granite or quartz, which can save you money. Cheap granite tops or discounted quartz slabs might have some downsides. You may find lower quality or fewer color choices. The Most Expensive Countertops: Is Quartz More Expensive Than Granite? So, is quartz or granite more expensive? Granite countertops might cost less at first. However, quartz countertops are usually a better investment. They last longer, are easier to maintain, and offer more style options. Quartz countertops may cost more per square foot. However, consider the full picture. This includes installation costs and long-term maintenance expenses. If you are aiming for a high-end look, both quartz and granite can offer luxurious results. If budget is a key concern, granite might be your best option for kitchen countertops. Look for slabs on sale or at clearance prices for better deals. Don’t forget, the cost of installed quartz countertops can sometimes be balanced out by cheaper options on sale. Choosing the Right Material for Your Kitchen Countertop Choosing the right material depends on a few things. These include your budget, style, and how much upkeep you want. Choosing white countertops can brighten your kitchen. If you like the natural look, granite is a great option. Knowing the cost of kitchen countertops is important. Consider the types of stone for countertops. Also, think about their costs for installation and long-term care. Homeowners wanting to balance cost, beauty, and durability can consider quartz. It’s a great alternative to granite and marble. Quartz countertops are beautiful, durable, and easy to maintain. Granite countertops, on the other hand, have a classic and timeless appeal. Cost of Kitchen Countertops: Other Factors to Consider When calculating the cost to install quartz or granite countertops, consider more than just the base price of the material. For example, the size and layout of your kitchen will impact the number of slabs needed. Additionally, intricate designs or custom finishes may increase the overall price. Other key points include the costs of countertop materials. Installation can also affect the final price. For all-white countertops, think about quartz options like white quartz or rose quartz. Their prices can vary based on the manufacturer and pattern availability Conclusion: In conclusion, when comparing quartz vs granite, there’s no one-size-fits-all answer. Quartz countertops come in many

Is Epoxy Resin Out of Style
Blog

Is Epoxy Resin Out of Style?

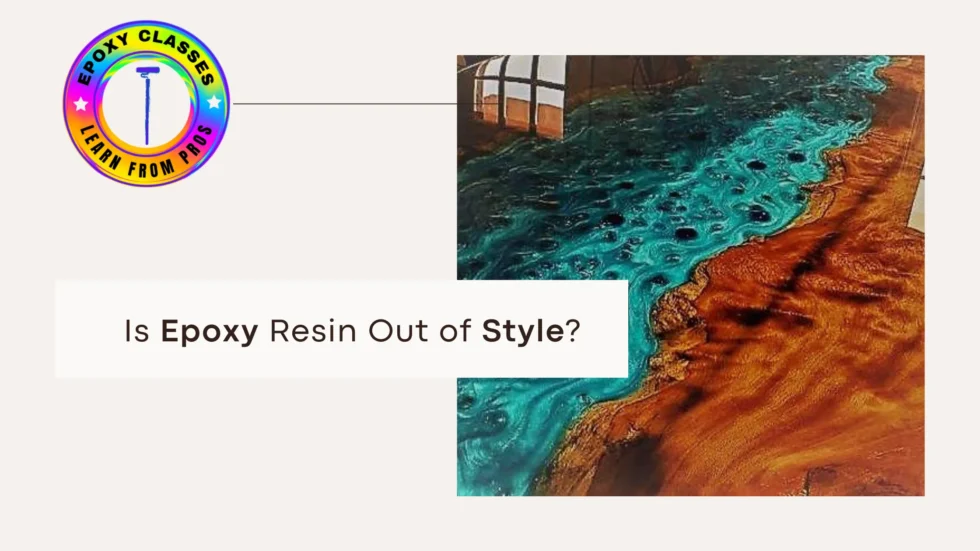
Epoxy resin has long been celebrated for its versatility and durability, making it a staple in various industries, from construction to art. However, as design trends evolve and sustainability becomes a priority, one might wonder: is epoxy resin out of style? This comprehensive guide delves into current trends, applications, and the future of epoxy resin, addressing common questions and providing insights for enthusiasts and professionals alike. Ready to level up your epoxy resin game? Epoxy Classes NY provides tailored training. You can learn techniques and boost your creativity. Understanding Epoxy Resin Epoxy resin is a two-part system comprising a resin and a hardener. When mixed, they undergo a chemical reaction that results in a hard, durable plastic. This material is renowned for its excellent adhesion, chemical resistance, and ability to form a high-gloss finish, making it ideal for various applications. Is Epoxy Resin Out of Style? Far from being out of style, epoxy resin continues to be a popular choice in numerous fields. Its adaptability allows it to meet the demands of modern design and functionality. From clear wood epoxy resin applications to innovative uses in flooring and art, epoxy resin remains a relevant and sought-after material. Trending Applications of Epoxy Resin 1. Clear Wood Epoxy Resin Combining epoxy with wood creates stunning, durable surfaces. The clear wood epoxy resin enhances the natural beauty of wood grain while providing a robust finish. This application is particularly popular in furniture making and custom countertops. 2. Epoxy Finishing Resin Used as a top layer, epoxy finishing resin offers a glossy, protective coat that enhances the depth and vibrancy of underlying colors. It’s commonly applied in art projects, tabletops, and bar tops to achieve a high-gloss, durable finish. 3. Water Epoxy Water-based epoxy resins are gaining traction due to their lower environmental impact and ease of use. They emit fewer volatile organic compounds (VOCs), making them a healthier choice for indoor applications. 4. Coating Wood with Epoxy Resin Applying epoxy resin as a clear coat on wood surfaces not only enhances their appearance but also provides protection against moisture and wear. This technique is widely used in crafting and furniture restoration. 5. Epoxy Clear Coat Wood An epoxy clear coat wood finish offers a durable, water-resistant layer that preserves the wood’s natural look while providing long-lasting protection. It’s ideal for both indoor and outdoor wood projects. Addressing Common Questions Can You Put Water-Based Polyurethane Over Epoxy? Yes, you can apply water-based polyurethane over epoxy resin. Ensure the epoxy is fully cured and sanded to create a smooth surface for adhesion. This combination provides an additional layer of protection and can enhance the finish’s durability. The Future of Epoxy Resin The epoxy resin market is experiencing significant growth, driven by advancements in technology and increased demand across various industries. Innovations such as bio-based epoxy resins and smart materials are paving the way for more sustainable and high-performance applications. The versatility and adaptability of epoxy resin ensure its continued relevance in the future. Conclusion Epoxy resin is far from being out of style. Its enduring popularity and adaptability across various applications—from clear wood epoxy resin projects to innovative uses in flooring and art—demonstrate its continued relevance. As trends evolve, epoxy resin remains a versatile and essential material in both creative and industrial domains. FAQs  What is the difference between epoxy resin and polyurethane? Epoxy resin is a two-part system that cures to form a hard, durable surface, ideal for bonding and coating applications. Polyurethane, on the other hand, is a polymer known for its flexibility and resistance to abrasion, commonly used as a topcoat for added protection.  Can epoxy resin be used outdoors? Yes, epoxy resin can be used outdoors, but it’s essential to choose a formulation that is UV-resistant to prevent yellowing and degradation from sun exposure.  How do I apply epoxy resin to wood? To apply epoxy resin to wood, ensure the surface is clean and dry. Mix the resin and hardener according to the manufacturer’s instructions, then pour or brush the mixture onto the wood. Allow it to cure fully before sanding and applying additional coats if necessary.  Is epoxy resin safe to use? While epoxy resin is generally safe when used correctly, it’s important to follow safety guidelines, such as wearing gloves and working in a well-ventilated area, to minimize exposure to fumes and skin contact.

How Much Does a 12×12 Concrete Slab Cost​
Blog

How Much Does a 12×12 Concrete Slab Cost​

​A 12×12 concrete slab is popular in homes and businesses. It serves as a base for projects like shed floors, patios, and small foundations. Knowing the 12 x 12 concrete slab cost is key for smart budgeting. When you understand the numbers, you can build with confidence. Average Cost of a 12×12 Concrete Slab A 12×12 concrete slab will cost between $864 and $1,440. This price includes a standard 4-inch thickness, materials, labor, and basic finishing. If you want thicker slabs or extra reinforcement, like rebar or mesh, be ready to spend more. What Affects the Cost? When pricing a concrete slab, several key factors matter: Each factor shapes your concrete project and affects your budget. How to Calculate Concrete Square Footage and Volume To calculate square footage: To calculate how much concrete you need in cubic yards: How Many Bags of Concrete Do You Need for a 12×12 Slab? For a 4-inch-thick slab: It’s always best to use a concrete calculator to fine-tune the estimate based on your exact slab thickness and local conditions. Common Searches Related to 12×12 Slabs People researching concrete slabs often look for: These terms show the strong interest in small to medium-sized slabs for homes and businesses. Professional Training with Epoxy Classes NY At  Epoxy Classes NY, we build a strong base for flooring skills. We offer expert training in concrete and epoxy systems. Our program suits contractors and professionals eager to enhance their abilities. Join our hands-on classes! These are perfect for anyone who wants to learn about concrete pouring, decorative finishes, and smooth epoxy coatings. Unlock your potential with the floors you create! Their approach uses hands-on demonstrations and step-by-step teaching. This helps students gain confidence and skill in real-world situations. Conclusion: How Much Does a 12×12 Concrete Slab Cost​ A 12 x 12 concrete slab cost ranges from $864 to $1,440, depending on the slab thickness, reinforcements, and finishes.If you’re planning a patio, foundation, or floor base, know your material and labor needs.If you want professional results, invest in training. EpoxyClassesNY offers programs that teach you the skills for quality concrete work. FAQs What is the standard thickness for a 12×12 concrete slab? The most common thickness for a 12×12 concrete slab is 4 inches. However, for heavier use or structural foundations, the slab might need to be 6 inches thick or more for added strength and durability. How do I calculate the concrete volume for a 12×12 slab? To calculate the concrete volume for a 12×12 slab: For a 4-inch thick slab, you will need approximately 1.75 cubic yards of concrete. What factors affect the cost of a concrete slab? Several factors can influence the cost of a concrete slab, including: How much does a 12×24 concrete slab cost? A 12×24 concrete slab will cost roughly twice the price of a 12×12 slab. The cost for a 12×24 slab typically ranges from $1,728 to $2,880, depending on factors like thickness, reinforcements, and finishing.

How to Rip Up Linoleum Flooring
Blog

How to Rip Up Linoleum Flooring?

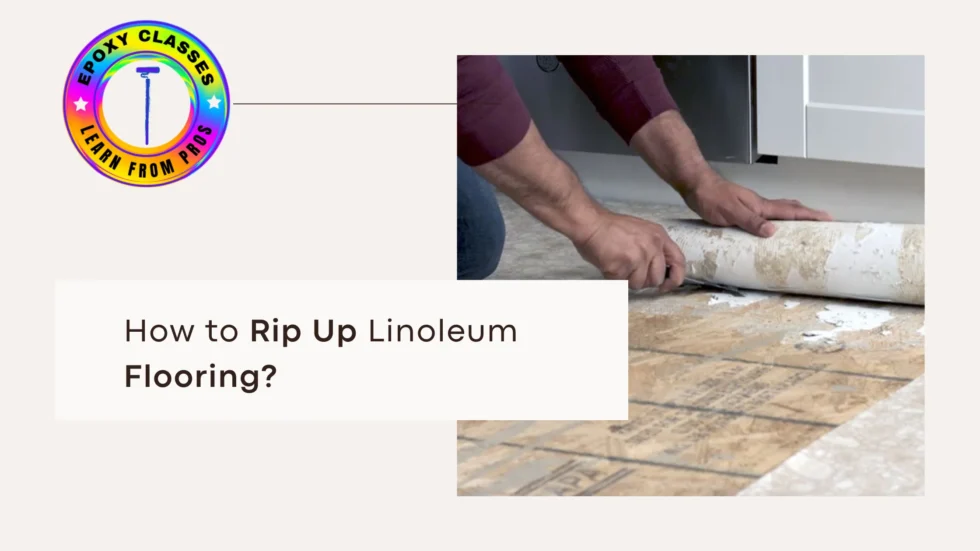
Are you worrying about how to remove linoleum?  Removing old linoleum may seem tough, but it’s not so bad! With the right tools and a bit of patience, you can make it easier.Start off right to save time and reduce frustration! If you want stylish vinyl, classic hardwood, or beautiful tile, carefully remove the old floor.Here’s a quick guide to help you: Let’s look in detail. How to Remove Old Linoleum Flooring Removing old linoleum might feel like a big task, but don’t worry! With the right tools and a bit of patience, you can do it. To switch to stylish vinyl, warm hardwood, or modern tile, you need a clean surface first. Follow this simple guide for a successful change! Before you start, clear your space. Move furniture aside and open a window; old adhesive can smell strong. Wear gloves, safety goggles, and knee pads for comfort and safety while you work. Having the right tools makes this job a whole lot easier. Here’s what you’ll want nearby: These tools will save you time—and your sanity. Find a loose corner or edge and gently lift it using your pry bar or putty knife. Once you get a section started, you can usually peel it off in larger chunks.How to remove linoleum flooring adhesive?If the linoleum is stuck (especially older vinyl), warm it up with a heat gun or hair dryer. That softens the adhesive underneath and helps the flooring come up more easily. If you’re pulling up old vinyl flooring. Now comes the sticky part—literally.Here’s how to remove leftover glue: Step 1: Apply an adhesive remover (or a vinegar-water mix for a DIY option) and let it sit for 10–15 minutes. Step 2: Gently scrape the glue off with a putty knife or floor scraper. Step 3: For tougher spots, a vinyl flooring removal tool can make the job easier. Step 4: Wipe the floor with warm water when you’re done to clean off any residue. Take your time—this step makes a big difference for your next floor layer. Some glued-down vinyl floors are extra stubborn. If you’re struggling, go back to your heat gun—it softens the glue and helps loosen up those tight spots. Just be patient and work in sections. If you’re dealing with super old linoleum or vinyl that just won’t budge, don’t force it. Stick with heat and an adhesive remover made specifically for these materials. That way, you protect your subfloor and avoid extra repair work later. Once the flooring and glue are gone, give the surface a good scrub. You’ll want a smooth, clean base before you lay anything new down. Whether it’s vinyl, tile, hardwood—or even a polished epoxy finish—a clean subfloor is key to a flawless result. Visit Epoxy Classes NY to learn more and start your next project with confidence! Conclusion: How to Rip Up Linoleum Flooring Remove old linoleum flooring may seem daunting. But with the right tools and some basic knowledge, it’s quite doable. Take your time and work in small sections. Be patient, especially with stubborn glue or tight corners. To get ready for new vinyl, hardwood, or epoxy floors, start with a clean, well-prepped surface. It’s key to success. The better the prep, the better the final result. If you want to improve your skills or work on flooring projects, don’t go it alone. Epoxy Classes NY provides hands-on training led by experts. This training helps you feel confident and capable, regardless of your experience level. FAQs: How to remove glued down vinyl flooring? A: First, loosen the glue. Use a heat gun or a hair dryer to warm the adhesive. This helps you pull up the flooring in larger pieces. Next, take a vinyl flooring removal tool or a sturdy scraper to remove the leftover glue.  Do I have to replace the subfloor too? A: Not usually! You can keep the subfloor unless it’s damaged, moldy, or very uneven. Just clean it well after removing the linoleum and scraping off the glue. A smooth, clean surface will make installing your new floor much easier. Can I use stuff from home to get rid of the leftover glue? A: For light adhesive, a vinegar and water mix can work well. But for older or sticky glue, use a commercial adhesive remover made for vinyl or linoleum. It works faster and protects your subfloor.

Hands-on epoxy flooring training in Johnstown, NY. Learn real skills, build a real business, and create floors that last.

TRAINING

Copyright © 2026 – Epoxy Classes NY

Scroll to Top