NEXT CLASS: AUGUST 28-30 • LIMITED SPOTS

Blog

is-epoxy-flooring-expensive
Blog

Is Epoxy Flooring Expensive?

Epoxy flooring is becoming popular in homes and businesses. Its durability, attractive look, and smooth finish make it a top choice. Many wonder, “is epoxy flooring expensive?” To decide, consider the cost per square foot and what affects it. We’ll cover three key points. First, we look at epoxy flooring costs. Then, we’ll discuss the benefits that justify the price. Finally, we’ll share tips to get the best value for the least cost. Understanding the Cost of Epoxy Flooring The cost of an epoxy floor varies. It depends on the type of epoxy, size, and your design. Typically, epoxy flooring rate per sqft prices from $3 to $12 per square foot. This helps you budget for your project. Epoxy Flooring New York Considering epoxy flooring New York? Be prepared to spend more. Prices are higher than in other areas. This is due to expensive labor, quality materials, and a demand for work. The average price for epoxy flooring is between $3 to $15 per square foot. The busy market drives these prices, ensuring only the best succeed. Residential vs. Commercial Costs The cost of epoxy flooring also varies between residential and commercial spaces: Factors Affecting the Cost of Epoxy Flooring Several key factors influence how much epoxy flooring cost: 1.Type of Epoxy The type of epoxy you choose plays a significant role in determining the overall cost: 2.Surface Preparation The key to beautiful epoxy flooring is good surface prep. It’s like setting the stage for a work of art. This step can also influence the cost, typically between $1 and $5 per square foot. Surface prep includes cleaning dirt, fixing cracks, grinding flaws, and leveling the floor. Always remember that a strong base ensures a durable finish! 3.Area Size The size of the area being floored significantly impacts the total cost. Larger spaces often benefit from economies of scale. This lowers the cost of epoxy flooring per square foot. Conversely, smaller areas may have higher costs. Smaller projects require more labor and materials. 4.Labor Costs Labor costs vary by location and the complexity of the installation. In cities like New York, where epoxy flooring New York is in high demand, labor rates are typically higher. The cost of epoxy floors in these areas reflects the premium charged by skilled pros who ensure a flawless finish. Is Epoxy Flooring Worth the Cost? Epoxy flooring may seem costly at first. But its long-term benefits make it a good investment. Here’s why epoxy flooring is considered cost-effective over time: 1.Durability Epoxy floors last 10 to 20 years. With care, they remain strong and durable. This avoids the need for replacements, saving you money. So, it’s a smart choice for your budget. 2.Low Maintenance Epoxy floors are easy and cheap to care for. Unlike other floors, they don’t need waxing or special cleaners. Just sweep and mop. This saves time and money. 3.Customizability Epoxy allows endless design possibilities for your floors. You can customize their look with various colors, textures, and finishes. This versatility can boost your space’s appeal. It avoids the costs of decorative flooring. 4.Resistance Epoxy resists chemicals, stains, and scratches. It is ideal for high-traffic, spill-prone areas, like garages and commercial kitchens. This resistance ensures that the flooring remains looking new and functional for years. How Much Does It Cost to Epoxy Floors? Here’s a detailed breakdown of typical epoxy flooring prices: Expert Epoxy Solutions in New York For epoxy flooring New York, choosing the right professional matters. Epoxy Classes NY offers high-quality, custom epoxy flooring. It will fit your style and budget. Their experts ensure seamless installations. They use premium materials and advanced techniques for flawless results. They offer expert, durable floors for garages. They also do stunning decorative epoxy finishes for commercial spaces. Safety Before Installing Epoxy Flooring When working with epoxy flooring, safety should always be a top priority. The U.S. EPA stresses precautions when using epoxy. This ensures safety and project success. Conclusion –Is Epoxy Flooring Expensive? Epoxy flooring costs more upfront, but it’s worth it. It’s durable, low-maintenance, and a smart long-term investment. Knowing the cost helps you budget. Prices range from $3 to $12 per square foot, with custom designs costing more. Epoxy flooring suits any budget without losing quality. It enhances your space’s beauty, functionality, and value. For the best results, choose Epoxy Classes NY. They ensure perfect installation and expert advice. FAQs About Epoxy Flooring Costs How much per square foot for epoxy flooring? Epoxy flooring costs $3 to $12 per sqft. It depends on the epoxy type and installation’s complexity. What is the average price for epoxy flooring in residential spaces? Epoxy flooring in homes costs $4 to $10 per square foot, on average. The price depends on the area and design. What factors affect the cost of epoxy floor coating? Epoxy floor coating costs depend on: surface prep, epoxy type, labor, and custom work. How much does it cost to epoxy a garage floor? For residential garages, the cost typically ranges from $1,200 to $3,000, depending on the size and finish.
How to Prep Garage Floor for Epoxy
Blog

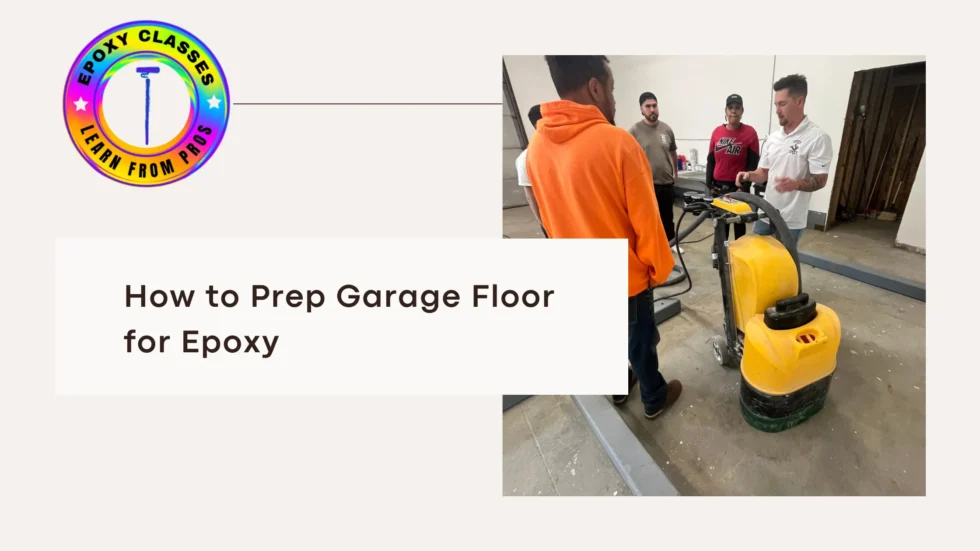
How to Prep Garage Floor for Epoxy?

Garage floors often show damage from neglect. Epoxy coatings provide a strong protective layer. These coatings are tough and resist stains, chemicals, and dirt. They also enhance your space. An epoxy finish turns dull concrete into a shiny surface. It’s easy to maintain too—just sweep and mop. With epoxy, your garage is both practical and attractive. To achieve a perfect, durable garage floor coating, careful preparation is key. It ensures strong adhesion, longevity, and better wear resistance. Skipping this step could ruin the project. For those wanting to master epoxy application, Epoxy Classes NY offers expert, hands-on training. Learn DIY techniques, like how to prep for epoxy garage floor coating. Or, explore advanced resurfacing methods. Register now. How to Prep Garage Floor for Epoxy Step 1: Clear the Garage Floor Completely Completely clear the floor and take vehicles, tools, shelves, and cabinets. A bare floor makes cleaning and preparation easier. This open space leads to better work and results. When you prep a garage floor for epoxy, ensure nothing blocks the areas where you will apply it. Step 2: Check for Sinking or Uneven Concrete Scrutinize the floor for dips and bumps. Level any problem spots with concrete techniques before moving forward. A flat surface ensures a sleek finish and prevents future cracks. It ensures a perfect epoxy job that lasts. Step 3: Deep Clean the Floor Start with a degreaser to remove oils and grime. Then, sweep and mop with soapy water. This prep work eliminates residues for better adhesion. A clean surface ensures a glossy finish. Don’t skip cleaning; it’s key to success. Step 4: Protect Walls and Fixtures Shield walls and shelves with plastic sheets and painter’s tape. This safeguards against dust and spills while prepping your garage floor. Thorough preparation guarantees a polished, pristine finish when applying epoxy. The before and after contrast will be striking. It will enhance your garage’s appearance. Step 5: Roughen the Concrete Surface For the epoxy coating for garage floor to adhere properly, the surface must be rough. Option 1: Grinding Use a concrete grinder to create a textured surface. Focus on removing any old coatings or paint. But can you put epoxy over painted concrete? It’s better to remove paint for optimal results. Option 2: Acid Etching Acid-etching offers another approach, though it demands careful handling and precision. After application, neutralize and thoroughly rinse the solution. This technique roughens the surface and removes debris, preparing it for epoxy coating. Exercise caution throughout the process to achieve optimal results for your flooring project. Step 6: Repair Cracks and Gaps Fill cracks with epoxy or concrete mender, following product instructions. Fixing flaws ensures a smooth epoxy floor. This step is key for a lasting, sleek coating. Step 7: Rinse and Let the Floor Dry Completely Rinse the floor to remove dust, debris, and cleaning residue. Let the concrete dry fully. Epoxy on damp concrete can peel or bubble. How long does garage floor epoxy take to dry? It varies. Usually, it takes 24-48 hours for light use, and up to 7 days to cure fully. Your Next Steps to a Stunning Garage Floor With your garage floor prep for epoxy complete, you’re ready to apply the coating. Proper preparation is the foundation of a durable, professional finish. A rolled-on floor coating will transform your space. So will any other method. Safety Guidelines for Epoxy Use For safety info on epoxy use, consult trusted sources like the CPSC. The CPSC has tips for using home improvement products, including epoxy coatings, safely in homes. Explore more here: CPSC’s Safety Guidelines on Home Improvement Products This resource ensures you follow key safety practices when using epoxy in any project, be it residential, commercial, or industrial. Conclusion How to Prep Garage Floor for Epoxy Perfect, long-lasting epoxy garage floors need careful preparation. First, clean, then etch the surface. This process ensures a strong bond. As a result, the coating will endure daily use and stay beautiful for years. Build up your skills with Epoxy Classes NY. Our workshops cover DIY floors to pro projects. Learn advanced techniques for perfect results. Turn your epoxy work into art with us. FAQs Can epoxy be applied over old paint? While you can apply epoxy over paint, it’s better to sand or remove it to improve adhesion. How do I prepare a concrete floor for epoxy? Follow steps like cleaning, repairing cracks, and etching. Also, ensure the floor is level and dry. Can I use epoxy on a cracked garage floor? Yes, but repair the cracks with epoxy filler first for a smooth and long-lasting finish.

How Much Is Epoxy Flooring Per Square Foot
Blog

How Much Is Epoxy Flooring Per Square Foot?

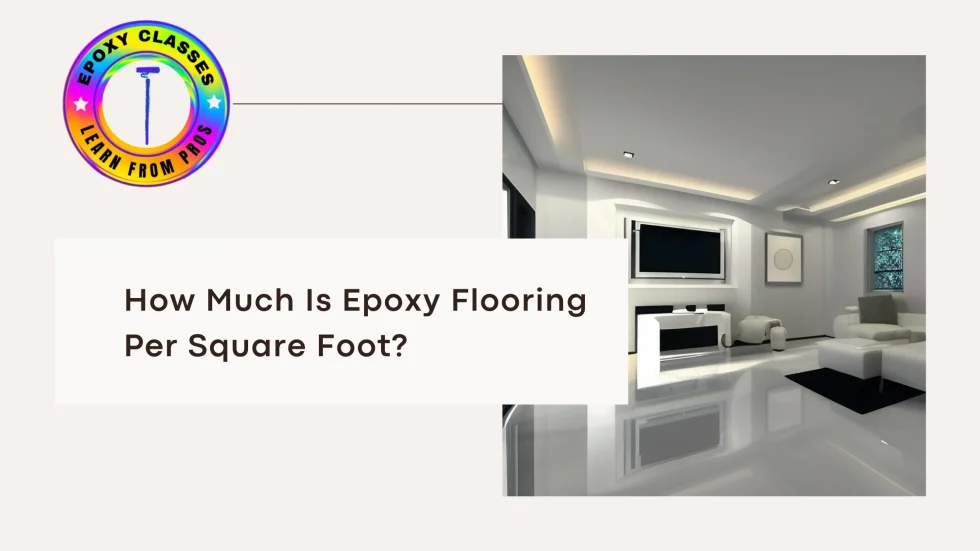
If you’re considering installing epoxy flooring, one of the first questions you’ll have is, “how much is epoxy flooring per square foot?” Understanding the pricing structure can help you make informed decisions, whether you’re working on a garage floor, basement, or a commercial space. Epoxy floors are known for their durability, easy maintenance, and sleek appearance, but the cost can vary depending on several factors. Let’s dive into what affects epoxy cost per sq ft and what you should consider when comparing prices. What is the Average Cost Per Square Foot for Epoxy Flooring? On average, how much per square foot for epoxy flooring? You can expect most basic epoxy flooring systems to start at around $5 per square foot. This price covers both materials and labor, but it can increase depending on the type of epoxy system you choose and the condition of your existing floor. For more advanced systems or custom designs such as all white, crazy metallics, custom vinyls/3D, the cost per square foot epoxy floor can go up to $12 or more. The overall price also depends on factors like surface preparation, additional coatings, and the size of the project. Factors That Affect Epoxy Cost Per Sq Ft Be Wary of Extremely Low Pricing While a few cents difference in the epoxy floor price per sq ft may not seem like much, extremely low pricing can be a red flag. If an installer is offering rates that are much lower than $5 per square foot, it likely means they are compromising on the quality of materials or labor. Some will use products not intended for the application but will do so to save money since the floor will last a few months before it begins to fail. Poor surface preparation, low-quality epoxy, or shortcuts during installation will lead to early floor failure, costing you more in repairs or replacements down the road. It’s always a good idea to get multiple quotes and ask questions about what is included in the price. Remember, a well-installed epoxy floor is an investment that can last 10-20 years, so it’s worth paying for quality.  How Much Epoxy Per Square Foot Do You Need? The amount of epoxy you’ll need also impacts the overall epoxy cost per sq ft. Typically, a gallon of epoxy can cover around 150-200 square feet, but the thickness of the application depending on the system it’s for will influence how much product is required. For more complex designs or multiple layers, you may need to purchase additional epoxy, which can raise the overall price of your project. Conclusion When it comes to understanding how much epoxy flooring is per square foot, the answer depends on the type of system, labor costs, and any additional customizations or floor prep. Most projects will start at around $5 per square foot, with higher-end systems reaching up to $14 or more. Be cautious of installers offering extremely low prices as this often means they’re cutting corners, which can lead to premature floor failure and more of a headache to get it fixed. To get the best results, invest in quality labor and materials to ensure your epoxy floor lasts for years to come. Hire a certified installer, or take a class! At Epoxy Classes NY, we focus on training installers the right way so they can go out there and do good work. Our epoxy classes are thorough and professional, teaching you the proper way to install floors that will last a lifetime. 

How to Clean Epoxy Garage Floor
Blog

How to Clean Epoxy Garage Floor?

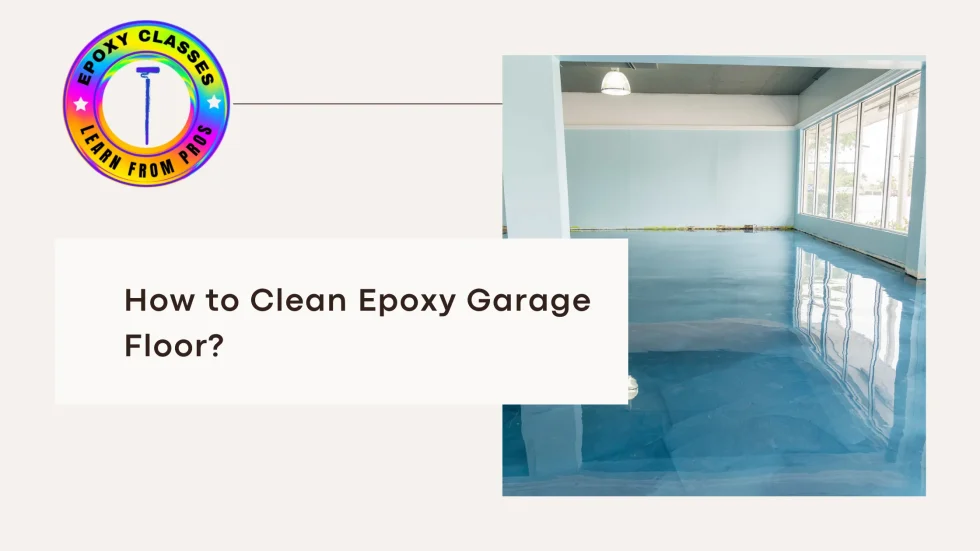
Maintaining your epoxy garage floor can extend its lifespan and keep it looking pristine for years. Whether you’re dealing with spills, stains, or everyday dirt, understanding the proper way to clean and maintain this type of flooring is essential. In this guide, we’ll cover how to clean an epoxy garage floor, how to keep it looking great, and answer some common questions on the subject. Why is Epoxy Floor Maintenance Important? Epoxy floors are highly durable, resistant to chemicals, and aesthetically appealing. However, regular maintenance ensures that the surface remains glossy and resistant to damage over time. Knowing how to keep garage floor clean will prevent dirt, stains, and wear from dulling the shine or causing long-term damage because although they are EXTREMELY easy to maintain, if you ignore them for a while, the dirt will add up. Step-by-Step: How to Clean an Epoxy Garage Floor 1. Sweep or Vacuum Regularly Dust, debris, and small rocks can lightly scratch the surface of your epoxy floor. Using a soft-bristle broom or vacuum is a quick and easy way to prevent this. Aim to sweep or vacuum your garage floor at least once a week to keep it clean. 2. Mop with Water and Mild Detergent When the dirt begins to accumulate, mopping the floor with warm water and a mild detergent is the most effective solution. Avoid harsh chemicals that can damage the surface, stay away from too acidic or too alkaline products. For best results, use a microfiber mop that will glide easily over the surface without leaving streaks. 3. Use a steam mop for Stubborn Stains If you’re dealing with oil spills, grease, or other stubborn stains, clean with a soft cloth and a small amount of garage floor concrete cleaner. Be sure to wipe up the cleaner thoroughly and avoid abrasive scrubbers that can dull the finish. You can also go in with a steam mop for dirtier stains. 4. Powerwash Garage Floor for Deep Cleaning For a thorough deep clean, you can powerwash garage floor surfaces. This is especially useful for larger messes or when preparing for a resealing project. However, make sure to use a low-pressure setting to avoid chipping or damaging the epoxy coating (which shouldn’t happen, if your floor was installed correctly). How to Keep Garage Floor Clean Long-Term Routine cleaning is crucial, but maintaining your epoxy garage floor goes beyond that. Here are some additional tips to keep it looking new: Frequently Asked Questions (FAQs) Conclusion Understanding how to clean epoxy garage floor surfaces is essential to maintaining their durability and appearance. By following the steps above and committing to regular epoxy floor maintenance, you’ll enjoy a clean, glossy garage floor for years. Whether it’s a simple sweep or a deep clean with a garage floor concrete cleaner, the right methods ensure your epoxy floor remains in top shape. Maintaining an epoxy floor doesn’t require a lot of effort but keeping up with routine cleaning is key to preserving its beauty and strength. Take care of your investment, and your garage will look as good as new! Please get in touch if you have any questions about our epoxy Classes in New York! We can help whether you want to sign up for one of our programs, need assistance with epoxy flooring care, or are just seeking for professional guidance. Reach out to us through phone, email, or our online form, and one of our staff members will get back to you right away. We can’t wait to teach and refine your epoxy flooring techniques in New York!

What Happens If You Don’t Sand Between Coats of Epoxy
Blog

What Happens If You Don’t Sand Between Coats of Epoxy?

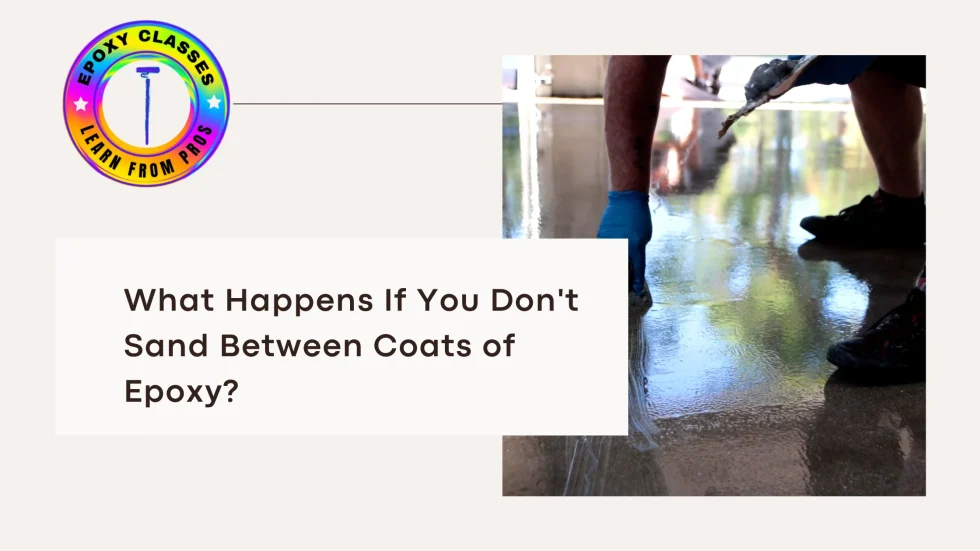
If you’re working on an epoxy garage floor project or any epoxy floor coating job, it’s crucial to understand the importance of sanding between coats. This simple step can make a big difference in the longevity and appearance of your floor. Whether you’re tackling a DIY project or taking a class with Epoxy Classes NY, knowing why sanding matters can save you time and ensure the best results. Why Sand Between Coats of Epoxy? When applying epoxy to a surface, it often takes more than one coat to achieve a durable and even finish. However, without sanding between layers, you could run into several issues. Let’s explore what happens if you skip this step. 1. Poor Adhesion Between Coats Epoxy forms a hard, glossy surface after curing. If you try to apply a new coat of epoxy over a previous coat without sanding, the smooth surface won’t provide enough texture for the new layer to properly bond. Sanding, or roughing it up, creates tiny grooves that allow the next coat to grip the surface, ensuring strong adhesion. Without sanding, the layers may peel or delaminate over time, leading to an uneven finish and an unsightly floor. This is especially important if you’re working on a garage floor coating, where the surface needs to be tough enough to withstand heavy foot traffic, hot tires, vehicles, and other stresses that can go on in a garage. 2. Imperfections in the Finish Even if the first coat looks perfect, skipping the sanding step can result in a rough, bumpy finish. Dust particles, small bubbles, and imperfections can get trapped between layers if you don’t sand between coats.   For those using garage epoxy to create a flawless, showroom-quality finish, this step is essential. Whether you’re a DIYer or seeking a “garage floor coating near me,” you don’t want to skip this critical process if you want the best results. 3. Reduced Durability of Your Epoxy Floor The purpose of a quality epoxy garage floor is to provide a tough, durable surface that stands up to wear and tear. But without proper adhesion between coats, your floor’s durability is compromised. When you skip sanding, you’re leaving weak spots where the epoxy is more likely to crack, chip, or peel over time. It’ll surprise you, the first few months the floor may look flawless, but over time these errors will show up. After that it’s much more expensive to get a previously coated floor repair. This can be a significant issue, especially in high-traffic areas like garages where the floor is exposed to vehicles, temperature changes, heavy equipment, and frequent use. Investing in professional service can ensure your garage floor coating is applied correctly and built to last.  How to Sand Between Epoxy Coats If you’re taking on the job yourself, here’s a quick guide to ensure you do it right: Why Choose Epoxy Classes NY? For homeowners and businesses looking to get the perfect epoxy floor coating without the hassle, Epoxy Classes NY offers professional installation services in Upstate NY. They ensure every step of the process is done with precision, from sanding between coats to final finishes. Whether you’re in need of an epoxy garage floor or a custom garage epoxy project, their experienced team guarantees a flawless result. If you’re wanting to get into the epoxy coatings industry and take a class, consider taking one of ours! Conclusion Sanding between coats of epoxy is a critical step that shouldn’t be overlooked. It ensures strong adhesion, a smooth finish, and long-lasting durability for your garage floor coating. Whether you’re a DIY enthusiast or considering hiring professionals like Epoxy Classes NY, taking the time to sand between coats will pay off in the long run with a beautiful, durable epoxy floor.

How Long Does Epoxy Floor Take to Dry
Blog

How Long Does Epoxy Floor Take to Dry?

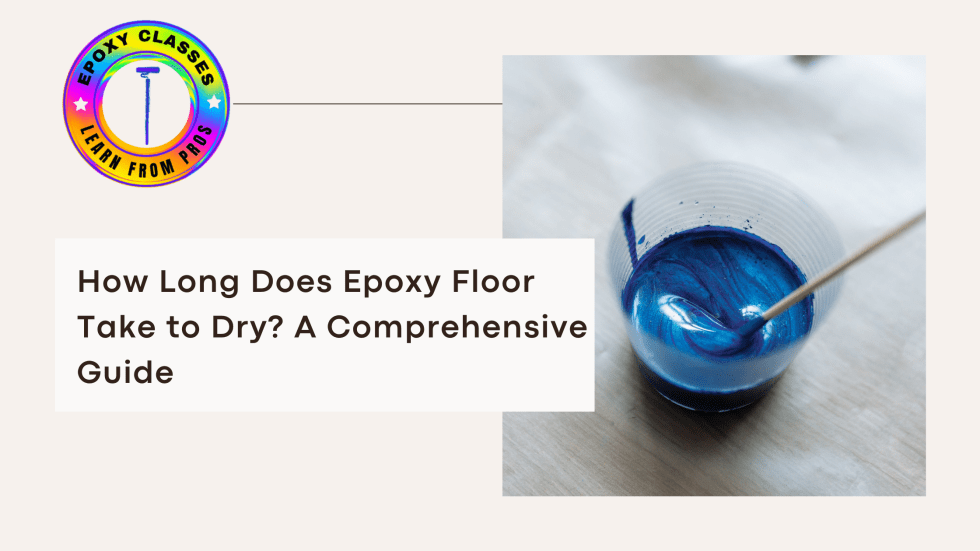
When considering a new flooring option, how long does epoxy floor take to dry is a common question. Whether you’re looking to enhance your garage, basement, or commercial space, understanding the drying and curing process of epoxy coatings is something you might want to pay attention to. Understanding Epoxy Floor Dry Time Epoxy flooring has gained popularity due to its durability, aesthetic appeal, and resistance to stains and chemicals. However, the epoxy dry time can vary based on several factors including temperature, humidity, and the specific epoxy product used. Typically, you can expect: What Influences Epoxy Dry Time? Several factors can impact how long for epoxy floor to cure: When Do You Add Aggregate to Epoxy Floors? Another important consideration is when do you add aggregate to epoxy floors. Adding aggregate not only enhances the slip resistance of the floor but it does influence the entire loo of the floor. This should typically be done while the epoxy is still sticky/ tacky, which is usually within the first few minutes after application. If you wait too long, the epoxy may become too hard for the aggregate to bond effectively. Garage Floor Epoxy Dry Time For those specifically interested in garage floor epoxy dry time, the application process should be similar to other ones. Expect the same initial set and cure times, but remember that garages often have fluctuating temperatures and humidity levels, which can extend the curing period. How Long Does Epoxy Take to Dry? To summarize, how long does epoxy take to dry depends on several conditions. Here’s a quick recap: Monitoring environmental conditions and following the manufacturer’s instructions can help ensure a successful application. Learn from the Best: Epoxy Classes in Upstate New York If you’re eager to dive deeper into the world of epoxy flooring, consider joining our Epoxy Classes in Upstate New York. Our professional instructor will teach and certify you on how to apply epoxy floors effectively, ensuring you understand every aspect, including drying and curing times. Whether you’re a DIY enthusiast or looking to start a new career in the industry, our classes provide the skills and knowledge necessary to become a professional. Conclusion In conclusion, understanding how long does epoxy floor take to dry is essential for a successful flooring project, whether you are the installer or the receiver. By considering factors such as temperature, humidity, and application technique, you can ensure a beautiful and long-lasting epoxy finish. For more information or to sign up for our classes, visit us today!

The Pros & Cons of Concrete Resurfacing and Refinishing
Blog

The Pros & Cons of Concrete Resurfacing and Refinishing

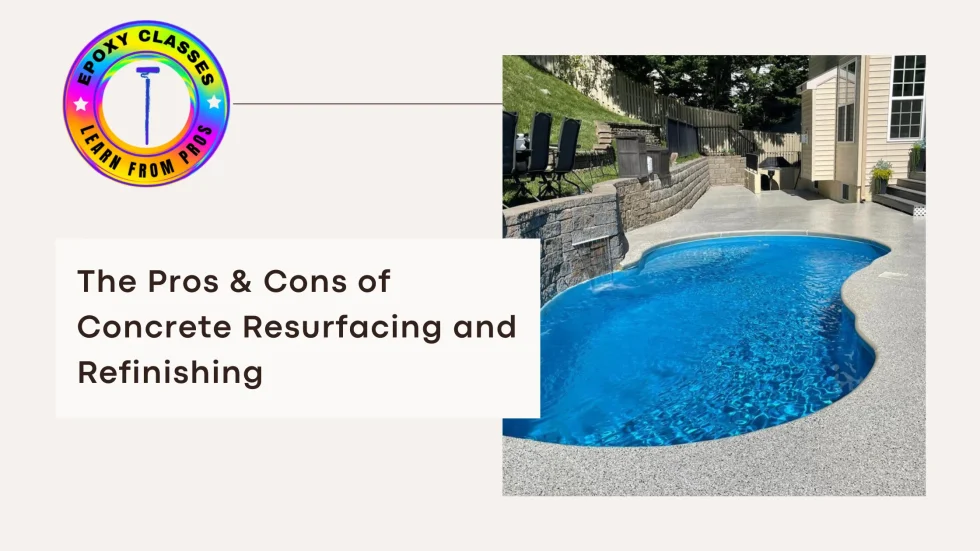
Concrete surfaces can age gracefully or deteriorate over time, affecting both their appearance and functionality. If you’re considering giving your concrete a fresh look or improving its durability, concrete resurfacing and refinishing might be on your radar. In this blog, we’ll explore the pros and cons of these methods, including insights into concrete resurfacing before and after, polyurea floor coating, concrete pool deck resurfacing, and flagstone stamped concrete. Pros of Concrete Resurfacing and Refinishing Concrete resurfacing and refinishing are often more affordable than full replacement. If your concrete surface is structurally sound but looks tired or outdated, resurfacing can provide a dramatic improvement without the expense of new installation. The cost of concrete resurfacing before and after is typically a fraction of what you’d pay for a complete overhaul. One of the most appealing aspects of resurfacing is the opportunity to update the look of your concrete. Whether you opt for a sleek, modern finish or something more decorative like flagstone stamped concrete, resurfacing can dramatically transform the appearance of your space. For example, flagstone stamped concrete can mimic the look of natural stone without the high cost. Concrete resurfacing often involves the application of durable coatings like polyurea floor coating. This type of coating is known for its exceptional resistance to abrasion, chemicals, and UV rays, making it ideal for high-traffic areas or outdoor environments. Polyurea can enhance the longevity of your concrete surface and keep it looking new for years. Concrete resurfacing can also address safety concerns. For instance, if your concrete pool deck is becoming slippery or cracked, resurfacing can provide a textured, non-slip surface. This is particularly important around the pool where safety is a top priority. Concrete pool deck resurfacing can refresh your deck and reduce the risk of accidents. Compared to full concrete replacement, resurfacing and refinishing are relatively quick processes. Most projects can be completed in a few days, depending on the size and complexity of the area. This means minimal disruption to your daily routine and a faster turnaround time for your updated concrete. Cons of Concrete Resurfacing and Refinishing For the best results, proper surface preparation is essential. This means cleaning, repairing cracks, and sometimes even grinding the existing surface. If not done correctly, the new finish may not adhere properly, leading to potential issues down the line. Concrete resurfacing before and after images often show that the preparation phase is crucial for achieving a smooth, long-lasting result. While resurfacing can extend the life of your concrete, it doesn’t last forever. The lifespan of a resurfaced surface can be influenced by factors such as foot traffic, weather conditions, and maintenance. Polyurea coatings, while durable, may still require occasional touch-ups or resealing. Resurfacing and refinishing are cosmetic fixes and won’t address underlying structural problems. If your concrete surface has significant cracks or structural damage, these issues need to be addressed separately. A resurfacing job on a damaged surface is unlikely to yield satisfactory results. Resurfaced concrete often requires specific maintenance to keep it looking its best. This might include regular cleaning, sealing, and avoiding harsh chemicals. For example, while polyurea coatings are resistant to many elements, they still benefit from periodic maintenance to ensure longevity. Though resurfacing can vastly improve the appearance of your concrete, there are limitations. Not every finish or texture will work with every surface. If you’re aiming for a very specific look, it’s important to consult with a professional to ensure that your desired finish is achievable and suitable for your concrete. Conclusion Concrete resurfacing and refinishing offer a range of benefits, from cost-effectiveness to aesthetic enhancement. Whether you’re updating your concrete around the pool with a fresh coat or considering a stylish flagstone stamped concrete look, these methods can provide a significant upgrade. However, it’s crucial to weigh the pros and cons and understand the preparation, maintenance, and limitations involved. With careful consideration and professional guidance, you can achieve a refreshed concrete surface that meets both your functional and aesthetic needs.

What Is Floor Space Ratio
Blog

What Is Floor Space Ratio?

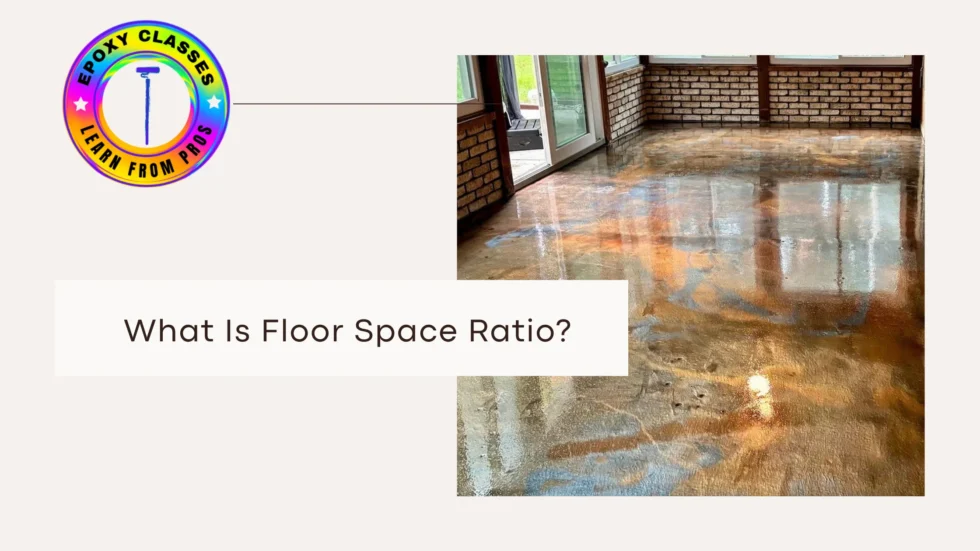
In real estate and urban planning, numbers tell important stories. The Floor Space Ratio (FSR) is one of the most important.  Understanding the FSR helps create balanced spaces. Knowing FSR is key, whether you design commercial buildings, cozy homes, or other structures.  It serves as a guide for success in every architectural project. What is Floor Space Ratio? The Floor Space Ratio (FSR) is key to balance. It shows how much building can rise on a plot of land. Think of it this way: the total floor area of a building divided by the plot size. This ratio helps architects, city planners, and developers maintain. It prevents space from turning into a concrete jungle. It also ensures there are open spaces for everyone. A higher FSR means bigger buildings or taller structures. A lower FSR keeps the area open and adds more green spaces. Why is Floor Space Ratio Important in Urban Planning? The Floor Space Ratio (FSR) helps control building space on a plot. It ensures the area doesn’t feel too crowded. Residential areas often have a lower FSR. This helps keep homes spaced out. It also allows space for yards, gardens, and recreational areas. Commercial areas usually have a higher FSR. This allows more businesses to fit on the same land. Planners consider the environment, local rules, and the building’s purpose when choosing the FSR for an area. In residential areas, a lower FSR keeps homes spaced apart. This helps maintain privacy, sunlight, and fresh air. How Force Sensing Relates to FSR Sensors FSR sensors aren’t directly linked to Floor Space Ratio, but they are important in smart building systems. These sensors detect pressure or force on a surface. FSR sensors can track pressure, stress, and wear in building materials. This helps buildings stay safe and efficient over time. These sensors might not change the FSR directly. However, they support the building’s long-term performance and health. Determining Floor Area Ratio in Real Estate Calculating the floor area ratio is an important step in any building project. Architects and developers figure out the FSR by checking zoning laws. They also think about the land’s use, such as for homes or businesses, and the maximum space allowed. It ensures that the building will fit properly on the land and not overcrowd the area. The building efficiency ratio also plays a role in the FSR. This ratio measures how well the available floor space is being used. A high efficiency ratio shows the building uses its space well. A lower ratio may mean some areas are unused or not used enough. House Spacing and Its Role in FSR In residential neighborhoods, house spacing is key to the FSR. The distance between homes offers privacy, lets in sunlight, and allows fresh air to flow. This setup boosts the community’s livability and charm. An ideal FSR balances cozy homes with open spaces, improving residents’ lives. Conclusion: What Is Floor Space Ratio? Knowing the floor space ratio is key for those in building design, urban planning, or real estate development. Calculating and using FSR is key. It helps buildings follow zoning rules, use space well, and promote sustainable growth. If you’re designing a new development or want to learn about space planning, understanding FSR is key. To learn about building design and apply it to real projects, check out Epoxy Classes NY. They offer training in construction, design, and more. Their expert courses will help you learn about building codes, planning methods, and design strategies. Visit EpoxyClassesNY.com to learn more and start your journey in construction and design today! Frequently Asked Questions (FAQs) What is the Floor Space Ratio (FSR)? The Floor Space Ratio (FSR) acts like a balance beam for buildings. It compares total floor area to land size. This ratio prevents our urban areas from feeling cramped. By measuring FSR, we create space for green areas. Our cities can then thrive instead of suffocating. How is Floor Space Ratio (FSR) calculated? Calculating the Floor Space Ratio (FSR) is easy! Just divide the total floor area of a building by the land area. For example, if your building has 10,000 square feet and the land is 5,000 square feet, the FSR is 2.0 (10,000 ÷ 5,000). It’s that simple! Why is Floor Space Ratio (FSR) important in urban planning? FSR creates urban harmony by balancing busy development with peaceful spaces. It prevents overcrowding, allowing sunlight, air, and privacy to thrive. With FSR, cities can grow beautifully, ensuring livable areas for everyone. How do FSR sensors relate to building design? FSR sensors don’t measure floor space, but they play a key role in smart buildings. They measure pressure, stress, and wear. These sensors help ensure buildings remain safe and efficient over time. Where can I learn more about FSR and building design? For more on FSR and building design, check out Epoxy Classes NY. They provide thorough training on construction, design, and more. Their courses provide the knowledge and skills you need. You can apply these concepts to real-world projects.

Can You Put Polyurethane Over Alkyd Paint
Blog

Can You Put Polyurethane Over Alkyd Paint?

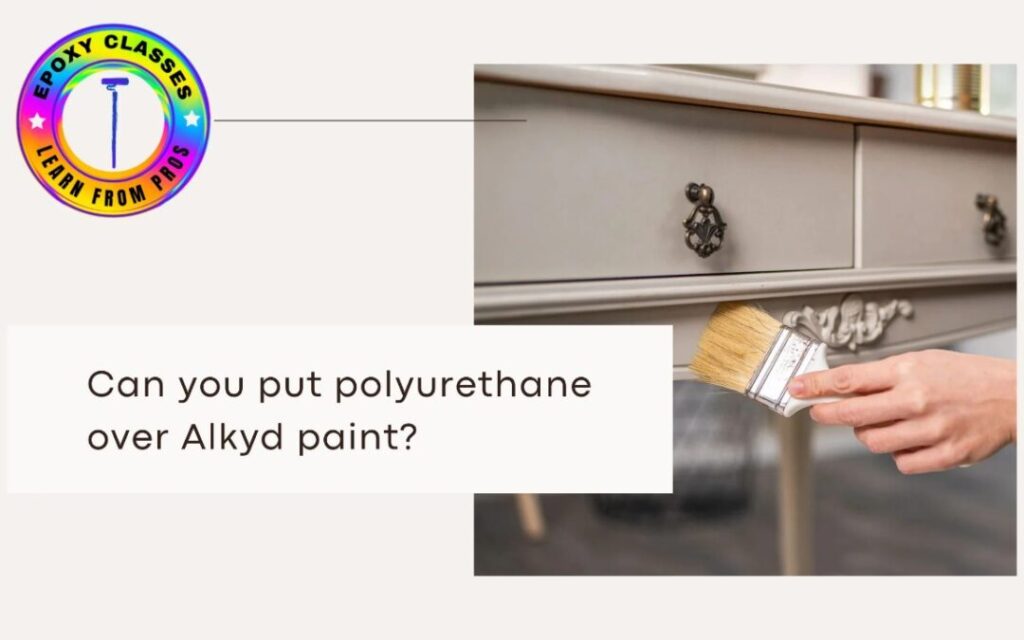
Wondering if you can apply polyurethane over alkyd paint for a durable, glossy finish? It’s one of the questions we commonly hear from both DIY enthusiasts as well as professionals. Whether you are refinishing a furniture or improving epoxy floor, knowing how these coatings interact is essential to get a classic, flawless result.   At Epoxy Classes NY, we are all about guiding and teaching the art of long lasting, durable  surfaces. Here’s a quick guide for you, let’s break down the information, analyze the steps, and exchange advice from experts to help you make your project stand out.  Alkyd Paint and Polyurethane: Learn The Basics Let’s start with knowing what Alkyd paint and polyurethane is. Alkyd paint is an oil based paint that works best for high traffic areas like trim or furniture. It provides a durable and glossy finish. On the other hand, polyurethane works as a protective topcoat that adds toughness to the surface, helping it stand against scratches and water. Another common question asked is, can you put polyurethane over alkyd paint? A short answer? Yes, but it requires proper preparation, it’s a great way to increase the durability and shine.  Why Use Polyurethane Over Alkyd Paint? Applying polyurethane over alkyd paint can upgrade and enhance your project by: This combination is commonly used, especially for decorative pieces and painted furniture in homes and offices.  How to Apply Polyurethane Over Alkyd Paint Want to improve your coating skills? Join our epoxy classes for professional training and  hands-on experience! Things to Avoid Applying polyurethane over alkyd paint can be challenging. Our epoxy training provides the right skills you need to create flawless results. Join epoxy flooring classes or reserve your spot. Contact us for details and start your coating journey today! Frequently Asked Questions Can you apply polyurethane over alkyd paint without sanding? No, sanding between coats is important for adhesion and preventing peeling. Does polyurethane change alkyd paint’s color? Water-based polyurethane stays clear; oil-based may add a slight yellow tint.   How long should alkyd paint dry before polyurethane? Wait 24-48 hours for alkyd to dry and cure fully. It may take longer depending on the type of product being used. 

Can You Permanently Seal a Slate Shower Floor Tile
Blog

Can You Permanently Seal a Slate Shower Floor Tile?

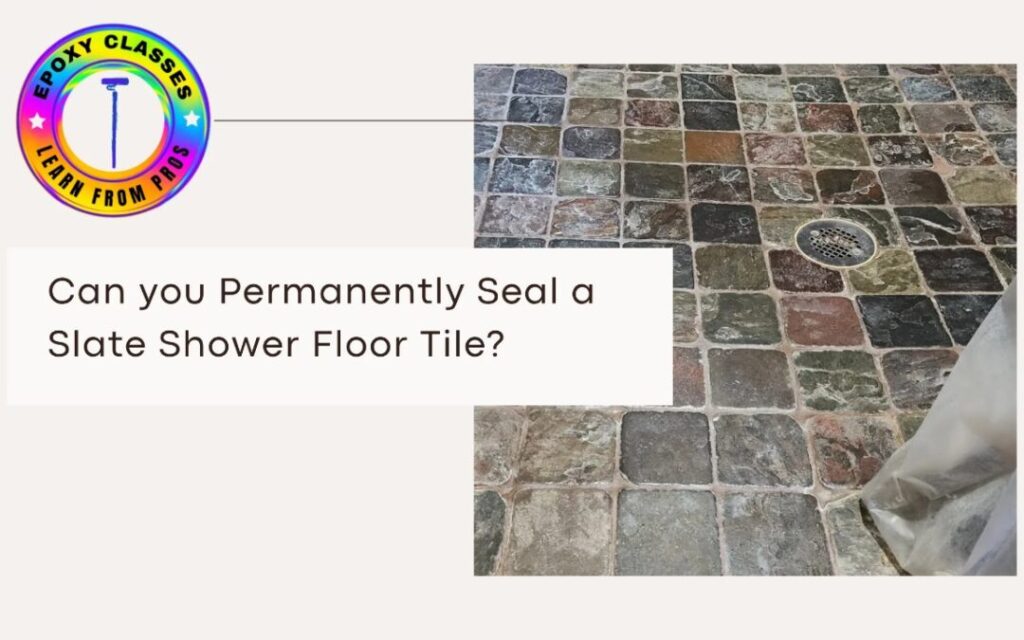
Are you also tired of maintaining your natural slate tiles? Well, you’re not alone. No one really wants to look at dull, stained and prone to water damage tiles in the shower. A common question asked by many homeowners and professionals is: can you permanently seal a slate shower floor tile? Short answer? No, permanent sealing is not possible but there are ways you can have long lasting protection that will keep your slate tile sealer working for years with little maintenance.  At Epoxy Classes NY, we provide hands-on learning experience with professional techniques for sealing and protecting all types of floors, including slate. With this detailed guide, learn how to seal slate tile, know the best slate sealer options and tips to make sealing slate a one time success. Lets jump in and transform your shower floors like a professional.      Why Sealing Slate Stone Is Necessary for Shower Floors Natural slate tiles look amazing, they are simple, durable and timeless. However, in a wet, high traffic shower they are a risk to: Sealing a slate floor helps repel water, protect from stains and enhance color depth without damaging the stone’s natural texture. How? Well, it protects the surface by creating a hydrophobic barrier. If done properly, your slate floor sealer can last 3 to 5 years, or more in low-use areas. To know whether your shower floor needs immediate sealing, test a small spot with water. This will help you know your slates porosity. If the floor gets dark or absorbs water in under 5 minutes, seal slate stone ASAP.  Best Slate and Tile Sealer Options Due to slate being naturally porous, permanent sealing is not possible. However, these few options come closest:  Why penetrating sealers are a win With epoxy classes near me training, learn modern and professional coating techniques that last longer than traditional sealers.  How To Seal Slate Tile? A 3-Step Method Common Mistakes To Avoid All set to protect floors like a pro? Check out our blogs for more tips and if you want to experience hands-on learning, register now. Be quick, classes fill up fast, hope you don’t miss your spot.  Frequently Asked Questions Q1. Can you permanently seal a slate shower floor tile? No, permanent sealing is not an option but with proper prep and care and applying premium penetrating slate sealer you can increase its longevity.  Q2. What’s the best slate and tile sealer for showers? Deep-penetrating slate sealer is the best option for showers. They are breathable, UV stable, and avoid peeling. Q3. How much time does sealing slate stone take? 4 to 6 hours of active work and a few days for prepping and curing.  Q4. Does sealing a slate floor make it slippery? No, high quality penetrating sealers maintain natural texture for safety.

Hands-on epoxy flooring training in Johnstown, NY. Learn real skills, build a real business, and create floors that last.

TRAINING

Copyright © 2026 – Epoxy Classes NY

Scroll to Top