NEXT CLASS: AUGUST 28-30 • LIMITED SPOTS

Blog

Top Mistakes to Avoid When Installing a DIY Epoxy Garage Floor
Blog

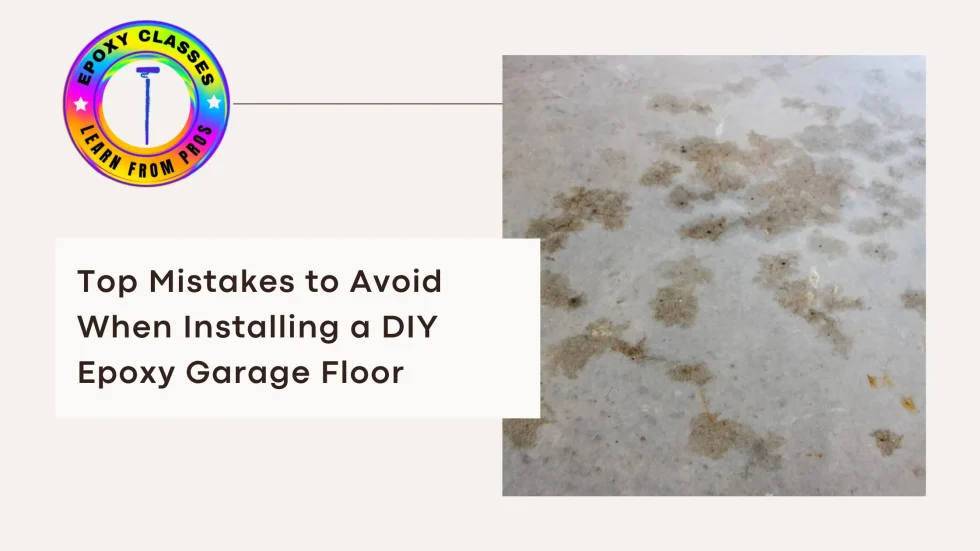
Top Mistakes to Avoid When Installing a DIY Epoxy Garage Floor

Installing an epoxy garage floor is a fantastic way to upgrade your space, but it’s not without its challenges. If you’re planning to tackle this project on your own, you’ll want to avoid some common mistakes that can compromise the quality and durability of your new floor. In this blog post, we’ll explore the top three mistakes homeowners often make when installing a DIY epoxy garage floor and how you can avoid them. 1. Not Buying Enough Product: Plan for Full Coverage One of the biggest mistakes DIYers make is underestimating how much epoxy they’ll need. It might be tempting to try and stretch your product, but not buying enough epoxy can leave you with a patchy, uneven floor. Keep in mind that epoxy needs to be applied thickly enough to ensure durability and a uniform finish. Thin coats may lead to weaker areas that are prone to cracking, peeling, or wearing down quickly. Solution: Before starting your project, measure your garage floor carefully and consult the manufacturer’s guidelines to ensure you buy enough epoxy. A good rule of thumb is to have slightly more product than you think you’ll need, rather than trying to cut corners. This will ensure your floor gets the full coverage it requires for a professional-looking finish that lasts. 2. Skipping Proper Cleaning: Dust and Debris Can Ruin Your Finish A clean surface is critical to a successful epoxy application. However, many DIYers rush through or skip this essential step, resulting in dust, dirt, or debris getting trapped beneath the epoxy. This leads to an uneven surface, poor adhesion, and, ultimately, a floor that peels or bubbles over time. Even the tiniest particles can interfere with how well the epoxy bonds to the concrete, so don’t overlook this step! Solution: Before applying the epoxy, take the time to thoroughly clean your garage floor. This includes sweeping up loose dirt and debris, power washing the surface, and using a degreaser to remove any oil or grease stains. If you are using a mechanical grinder (recommended) make sure to wipe down the concrete after vacuuming with acetone or denatured alcohol and a microfiber mop to get anything that is left! Make sure you don’t have any pictures, calendars, or posters on the walls. Leave the garage door open the entire time, don’t mess around with it because tons of dust gets trapped along the garage door. After cleaning, let the floor dry completely before applying the epoxy to ensure there’s no moisture that could prevent proper adhesion. It might feel like extra work, but a spotless surface is key to achieving a long-lasting, flawless epoxy garage floor. 3. Buying the Cheapest Material: You Get What You Pay For It’s easy to be tempted by budget-friendly epoxy kits, especially when you’re trying to save money on your garage upgrade. However, opting for the cheapest option can end up costing you more in the long run. Our installers have had to do countless “redos” of peoples garages who had previously DIY’d and gone with a cheaper kit. Lower-quality epoxy products tend to have less durability, thinner coverage, and may not have the same chemical resistance as higher-end options. Over time, a subpar epoxy floor can chip, crack, or discolor, leaving you frustrated and back at square one. Solution: When choosing your epoxy, don’t focus solely on price. Instead, look for reputable brands known for their high-quality products and durability. While premium epoxy kits may cost more upfront, they’re a worthwhile investment because they provide better coverage, longer-lasting protection, and superior resistance to wear and tear. Read reviews and consult with professionals to ensure you’re getting the best product for your garage floor. Conclusion: Avoid Common Pitfalls for a Successful Epoxy Floor A DIY epoxy garage floor can be a rewarding project, but avoiding common mistakes is crucial to achieving a beautiful and durable result. Make sure to buy enough products, thoroughly clean your floor, and invest in high-quality materials to ensure your epoxy floor stands the test of time. By taking these steps, you’ll avoid the pitfalls that can derail your project and enjoy a smooth, long-lasting garage floor that enhances your home’s value.

Epoxy Garage Floor Why It’s the Best Choice for Your Home
Blog

Epoxy Garage Floor: Why It’s the Best Choice for Your Home

When it comes to upgrading your garage, one of the best decisions you can make is installing an epoxy floor. Not only does it give your space a sleek and polished look, but it also offers a range of practical benefits that make it the ideal choice for any homeowner. In this article, we’ll explore why an epoxy floor in your garage is a smart investment, focusing on its non-slip properties, nonporous surface, antimicrobial benefits, and ease of cleaning and maintaining. 1. Non-Slip Surface: Safety First One of the primary concerns in any garage is safety, especially when it comes to slippery surfaces. An epoxy garage floor is designed with a non-slip finish, which means you won’t have to worry about dangerous slips and falls. Whether you’re dealing with oil spills, water from rain-soaked vehicles, or just daily foot traffic, the textured surface of an epoxy floor provides excellent traction. This is particularly important if you use your garage as a workshop or frequently have family members and pets moving in and out. 2. Nonporous: Resistant to Stains and Damage Garages are prone to spills, whether it’s oil, chemicals, or other automotive fluids. Unlike concrete, which is porous and can absorb these liquids, an epoxy floor is nonporous. This means that any spill will sit on top of the surface rather than seeping in, making clean-up a breeze. The nonporous nature of epoxy also protects the underlying concrete from damage, extending the life of your garage floor. 3. Antimicrobial Properties: A Cleaner, Healthier Space Another key advantage of an epoxy floor garage is its antimicrobial properties. The smooth, nonporous surface of epoxy resists the growth of bacteria, mold, and mildew, making your garage a healthier environment. This is particularly beneficial if you use your garage for storage or as an additional living space. You can rest easy knowing that your garage is free from harmful microbes that can lead to unpleasant odors and potential health hazards. 4. Easy to Clean: Less Maintenance, More Enjoyment One of the most significant benefits of choosing an epoxy garage floor is how easy it is to maintain. Thanks to its nonporous and smooth surface, dirt, dust, and debris can be quickly swept or mopped away. Unlike concrete, which can stain and require regular sealing, epoxy floors are virtually maintenance-free. A simple sweep and occasional mop are all it takes to keep your garage floor looking pristine. This ease of cleaning means you can spend less time worrying about maintenance and more time enjoying your upgraded space. Conclusion: Epoxy Garage Floors Offer Unmatched Benefits When it comes to durability, safety, and cleanliness, an epoxy floor garage is hard to beat. Its non-slip, nonporous, antimicrobial, and easy-to-clean properties make it the best choice for homeowners looking to enhance their garage space. Whether you’re using your garage for storage, as a workshop, or just to park your car, an epoxy floor will provide a functional and stylish upgrade that adds value to your home. So, if you’re considering a garage renovation, don’t overlook the many benefits of an epoxy floor. It’s an investment in safety, durability, and convenience that you’ll appreciate for years to come.

Transform Your Garage with a Stunning Epoxy Floor A Step-by-Step Installation Guide
Blog

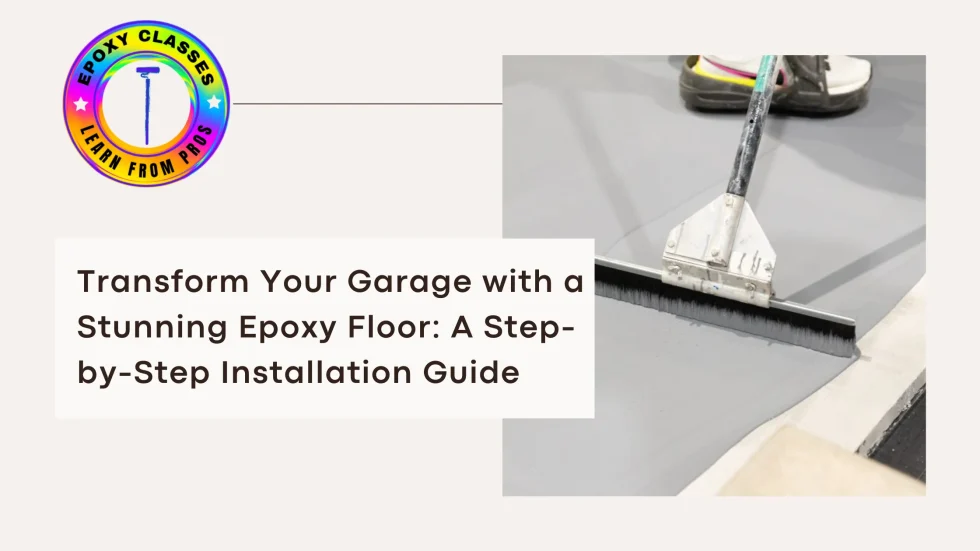
Transform Your Garage with a Stunning Epoxy Floor: A Step-by-Step Installation Guide

Epoxy garage floors offer a durable, attractive, and easy-to-maintain solution for upgrading your garage. With a sleek finish that resists stains, chemicals, and wear, epoxy can turn your old concrete slab into a modern, high-performance surface. If you’re ready to tackle this DIY project, here’s a comprehensive guide to help you through the installation process. Materials and Tools You’ll Need Before starting, gather the following materials and tools: Step 1: Prepare the Garage Floor Step 2: Repair Any Damage Inspect the concrete for any cracks or holes. Fill these with a concrete patching compound and smooth them out. Allow the patches to dry and cure as per the manufacturer’s instructions. Step 3: Apply the Epoxy Primer If your epoxy kit includes a primer, apply it according to the instructions. The primer enhances adhesion and helps the epoxy coat adhere better to the concrete surface. Use a paint roller to apply an even coat, focusing on covering all areas. Allow the primer to dry completely. Step 4: Mix and Apply the Epoxy Step 5: Add Decorative Flakes (Optional) If your epoxy kit includes decorative flakes or chips, broadcast them onto the wet epoxy while it’s still tacky. This adds texture and visual interest to the floor. Be sure to follow the manufacturer’s recommendations for the amount and distribution of flakes. Step 6: Allow to Cure After applying the epoxy, allow it to cure as per the manufacturer’s instructions. This typically involves letting the floor dry for at least 24 hours before light use and up to 7 days for heavy use. Ensure the garage is well-ventilated during this period to help the curing process. Step 7: Apply topcoat You will need to use a polyaspartic topcoat to seal in the flakes and provide further protection against UV and scratching. Follow manufacturer’s instructions for this process.  Step 8: Final Touches Once the epoxy has fully cured, remove any painter’s tape or plastic sheeting. Reorganize your garage, and enjoy your newly transformed space!

How Long to Let Paint Dry Between Coats
Blog

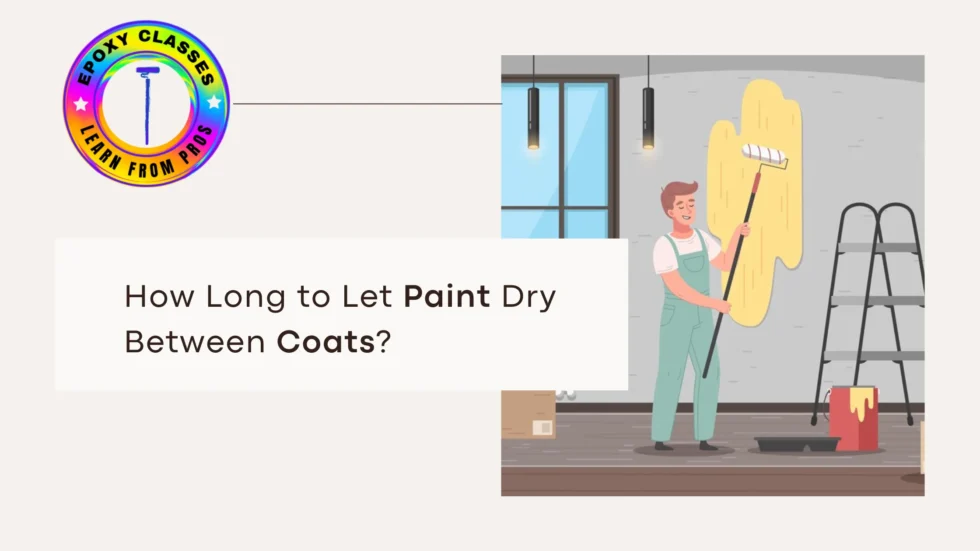
How Long to Let Paint Dry Between Coats?

How Long to Let Paint Dry Between Coats? A Complete Guide Applying multiple paint coats is key for a smooth, professional finish. Also, knowing how long to wait between coats is just as important. Applying the next coat of paint too soon can cause problems. You might end up with uneven texture, peeling, or even paint failure. The drying time for paint between coats depends on several factors. These include the type of We will cover how long to let paint dry between coats. This applies to latex, oil-based, and spray paint. At Epoxy Classes NY, we offer the best training in epoxy applications. We help professionals master coating techniques. No matter your skill level, our hands-on courses help you get perfect results. How Long Between Coats of Paint? The waiting time between coats varies depending on the type of paint. Water-based paints, such as latex, usually take about four hours to dry. In contrast, oil-based paints need at least 24 hours before you can apply another coat. The paint dry time between coats ensures proper adhesion and a durable finish. Spray paint dries quickly. It usually takes 10 to 30 minutes between light coats. Always check the manufacturer’s instructions for the best results. How Long to Wait Between Primer Coats? Using primer before painting is important. It makes the surface even and helps the paint stick better. The wait time between primer coats varies. It depends on if you use a latex primer or an oil-based one. Not waiting the right time for the recoat primer can cause adhesion issues. This may lead to peeling or uneven coverage. How Long Does Paint Have to Dry Before a Second Coat? To ensure the best results, each layer of paint should fully dry before applying another. Here’s a breakdown based on different paint types: For interior paint, drying times can be affected by humidity, temperature, and ventilation. If you’re painting in cold or humid conditions, paint drying time between coats may be extended. How Long Should Paint Dry Before Putting Stuff on It? Even after the second coat is applied, paint drying time doesn’t stop there. Before placing furniture or hanging artwork, you should wait for the paint to fully cure. Quick-dry formulas or paint sandrock techniques can help speed things up. However, being patient usually leads to better results. How Long Does It Take for Paint Primer to Dry? The drying time for primer depends on the product type and environmental factors. In general: Not waiting long enough between paint coats can cause uneven texture and problems with adhesion. How Long Does One Coat of Paint Take to Dry? The drying time for a single coat of paint varies: Applying a 2nd coat too soon can lead to smudging, peeling, or visible streaks. The wait time between paint coats ensures an even and professional look. Tips for Faster Paint Drying Time If you’re short on time, there are ways to speed up the drying process: By following these techniques, you can ensure that the paint dry time between coats is as short as possible without compromising quality. Final Thoughts How Long to Let Paint Dry Between Coats Understanding how long to wait before applying a second coat of paint is key to a smooth, professional finish. When you paint walls, furniture, or trim, it’s important to follow the drying times. This helps avoid problems like bubbling, peeling, or cracking. To get a perfect, durable finish, think about the paint type, the environment, and the surface material. Taking the time to let paint dry properly will save you time and effort in the long run. FAQs How long should I let paint dry between coats? For latex paints, patience is important. Wait at least four hours between coats. For oil-based paints, let them dry for 24 hours before applying another coat. How long does it take for paint primer to dry? Latex primer dries in just one hour. In contrast, oil-based primer needs a full 24 hours before you can use your brush. How long does it take wall paint to dry? Most wall paints dry to the touch within one to two hours, but you should wait four hours before recoating. How long should I wait before putting furniture against a painted wall? Wait at least 48 hours before moving furniture back against the wall.

How Much Epoxy Will I Need
Blog

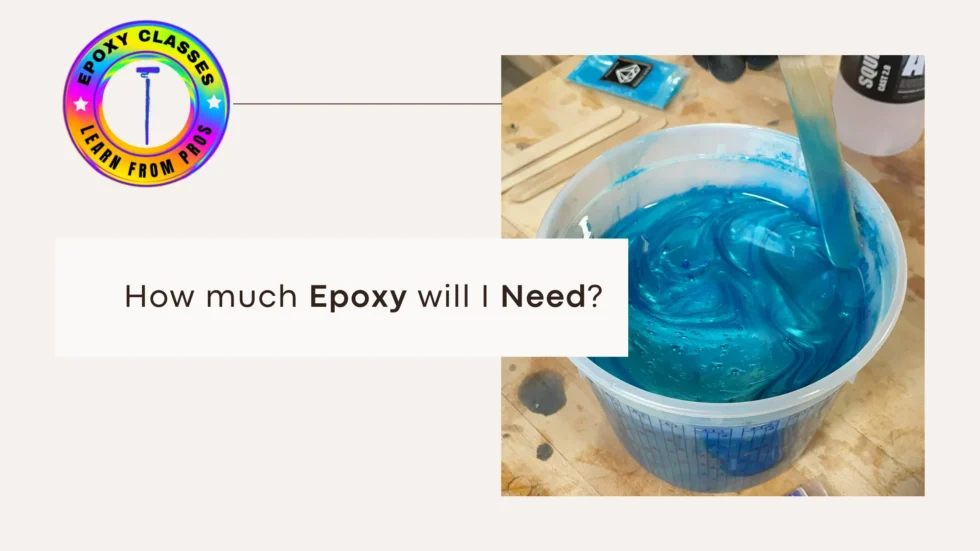
How Much Epoxy Will I Need?

Are You Worried: How Much Epoxy Will I Need? Epoxy resin is popular for making beautiful tabletops, countertops, bar tops, and floors. However, one of the most common questions when starting an epoxy project is: How much epoxy will I need? Measuring epoxy correctly is key. It helps you get a perfect finish, reduces waste, and keeps costs in check. This guide helps you find the right amount of epoxy for your project. Whether you’re making an epoxy table, a bar top, or another poured epoxy item, you’ll get the info you need. Use a resin calculator for the best results. Why Accurate Epoxy Calculations Matter Wrong epoxy measurements can cause uneven pours, waste, or running out of material during your project. Using the right epoxy ratio calculator helps your project have the right depth, coverage, and durability. How to Calculate Epoxy for Different Projects The amount of epoxy needed depends on the surface area, pour depth, and type of project. Here’s a breakdown of how much epoxy per square foot of countertop, tabletops, and other surfaces: 1.Seal Coat Epoxy Calculations A seal coat is a thin initial layer applied to prevent bubbles from forming during a deep pour. The amount needed varies based on the surface size. For example, if you have a clear table top epoxy project that is 10 sq. ft., you would need 10 ounces of epoxy for the seal coat. 2. Deep Pour Epoxy Table Calculations Deep pours require more epoxy than a standard thin-layer coating. For example, if your deep pour epoxy table is 24″ x 48″ and 2 inches thick, you will need approximately 3.5 gallons of epoxy. 3. Epoxy for Table Top & Bar Tops For a standard epoxy for table top or epoxy resin bar tops, the recommended thickness is 1/8 inch to 1/4 inch. To cover 15 square feet with Total Boat tabletop epoxy at 1/8-inch thickness, you need about 90 ounces of epoxy. How Much Epoxy Per Square Foot of Countertop? For epoxy countertop kit, the required amount depends on the thickness of the pour: For a standard 30 sq. ft. countertop at 1/8-inch thickness, you would need approximately 1.5 gallons of epoxy. Epoxy Resin Kits & Bulk Epoxy Options If you’re working on large-scale projects, choosing the right epoxy supply is essential. For small epoxy kit projects, like making table tops, a 1-gallon epoxy resin is often enough. Where Can You Buy Epoxy? Finding supplier epoxy resin at an affordable epoxy price can be a challenge. Here are some options: Epoxy Classes NY provides expert-led courses for high-quality training in epoxy work. These classes help both beginners and professionals master epoxy techniques. How to Pour Epoxy Resin Table Top Proper application ensures a smooth, bubble-free finish: How Many Square Feet Does a Gallon of Epoxy Cover? A 1-gallon epoxy resin typically covers: Using an epoxy ratio calculator ensures precise measurements. OSHA Safety Guidelines for Epoxy Handling Always wear gloves, goggles, and a mask when using epoxy resin. Also, make sure the area is well-ventilated. Follow OSHA guidelines to avoid skin irritation, breathing issues, and chemical burns while using epoxy. Final Thoughts: Get the Right Epoxy Amount for Your Project Knowing the right amount of epoxy per square foot is key for a professional finish. Use an epoxy floor calculator or Total Boat resin calculator for your epoxy kitchen table, box, or outdoor tabletop. This will help you get the right amount. For expert training on epoxy application, visit Epoxy Classes NY. Learn from industry professionals! Master epoxy pouring techniques and create stunning projects with confidence! Frequently Asked Questions (FAQs) How do I calculate how much epoxy I need? Use a resin or epoxy calculator. It helps based on your project’s size and thickness. How much epoxy do I need for a deep pour epoxy table? A deep pour epoxy table needs approximately 48 ounces per square foot per inch of depth. How much epoxy per square foot of countertop? For a countertop that’s only 1/8 inch thick, use 6 ounces per square foot. If you choose a thicker 1/4-inch option, increase it to 12 ounces per square foot. How much does epoxy cost? The cost of epoxy varies depending on quality and quantity. Bulk options like a 5-gallon bucket of epoxy offer savings over smaller kits. Where can I buy epoxy? You can buy epoxy at epoxy supply stores, online retailers, and specialty woodworking suppliers. How do I ensure a smooth epoxy table top? Use a seal coat, pour epoxy slowly, and remove bubbles with a heat gun. For best results, use a table top epoxy resin.

How to Protect Floors When Painting Walls
Blog

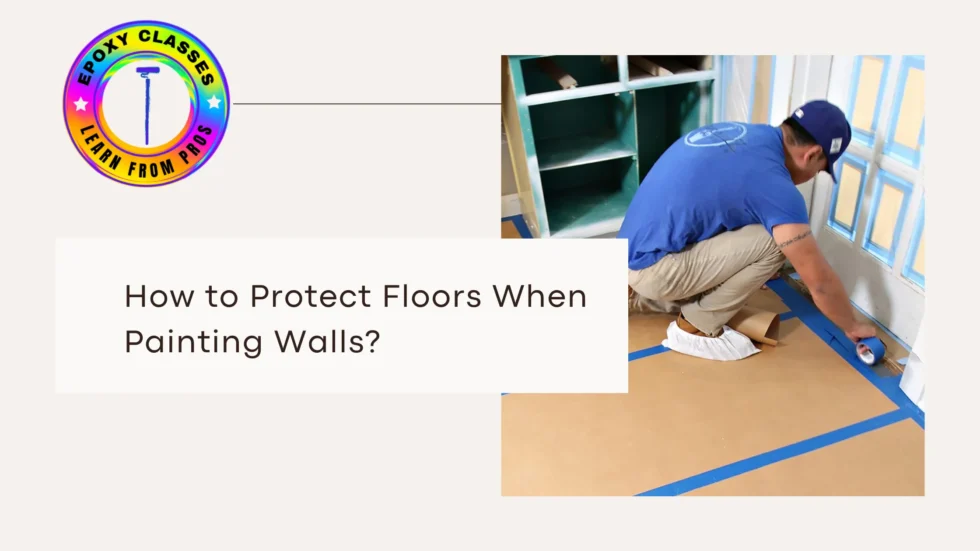
How to Protect Floors When Painting Walls

Painting walls can change your home’s look. But without the right precautions, it can turn into a messy disaster. Spilled paint, drips, and splatters can ruin floors, carpets, and even tubs. Covering floors when painting is key. It prevents damage and helps you achieve a professional look. We explain how to protect floors when painting walls. It keeps your surfaces spotless. Why Floor Protection Is Important When Painting Homeowners often overlook how crucial floor cover painting is. People see the importance when they face tough paint stains on hardwood, carpet, or tile floors. After paint dries, it can be tough to remove without harming the surface below. Using a painting floor cover ensures: Best Ways to Cover Floors When Painting 1.Use Floor Protection Paper Rolls One of the best solutions for floor covering for paint is floor protection paper rolls. These are designed to provide a strong barrier against paint spills and stains. 2.Plastic Covering for Floors If you’re looking for a waterproof option, plastic paint cover or floor protection plastic is a great choice. 3.Drop Cloths and Painter’s Cover Sheets For an easy, reusable option, painting cover sheets and drop cloths are ideal. 4.Floor Protection Mats and Painted Floor Mats Using painted floor mats is another effective method to prevent stains. 5.Carpet Covers for Painting If your painting project is in a carpeted room, a carpet cover for painting is essential. How to Apply Floor Protection When Painting Step 1: Prepare the Floor Before you cover floor when painting, clean the area to remove dirt and debris. This ensures the floor cover paint material adheres properly. Step 2: Choose the Right Floor Protector Select from floor protection paper rolls, plastic paint cover, or painting cover sheets based on your flooring type. Step 3: Secure the Floor Covering Use painter’s tape to hold the floor protector when painting in place. Ensure it covers the entire area, especially near the baseboards. Step 4: Start Painting With your floor covering for paint in place, you can begin painting without worrying about spills or drips. Step 5: Remove and Clean Up Once painting is complete, carefully remove the paint cover for floor and dispose of it properly. Additional Protection Tips for Floors and Tubs 1.Protecting Tubs from Paint Stains If you’re painting in a bathroom, don’t forget about paint on tub protection. Use plastic sheets and masking tape to keep paint off bathtubs and shower areas. 2. Using Floor Paint Protector A floor paint protector is an extra layer of sealant that prevents stains from penetrating deep into porous surfaces. 3.Covering Floors During Construction For ongoing renovations, floor protection paint is essential to prevent damage from heavy equipment, dust, and paint spills. Best Materials for Floor Covering When Painting Material Best Use Reusable Floor protection paper Hardwood, tile No Plastic covering for floors Carpet, construction sites No Painting cover sheets All surfaces Yes Painted floor mats Workshops, garages Yes Carpet cover for painting soft flooring, rugs No Conclusion Protecting your floors while painting is crucial to avoid damage and expensive repairs. By using the right painting floor cover, you can keep your floors spotless and ensure a smooth painting process. Whether you choose temporary floor protection paper, floor protection plastic, or painting cover sheets, selecting the right will make cleanup easy and hassle-free. Visit Epoxy Classes NY provides expert advice and training on floor coatings, ensuring your surfaces remain protected during any project. FAQs What is the best way to protect floors when painting walls? Using floor protection paper rolls, plastic paint covers, or painting cover sheets provides the best protection against spills and stains. Can I use plastic sheeting to protect my carpet when painting? Yes, painters carpet protector and plastic covering for floors work well for protecting carpets from paint spills. What is the best floor cover for painting in high-traffic areas? For high-traffic areas, floor protection paint mats and paint booth floor covering options are durable and reusable. How do I protect my bathtub while painting a bathroom? For paint on tub protection, use plastic sheets and painter’s tape to cover the bathtub and shower areas.

How to Install Epoxy Over Tile
Blog

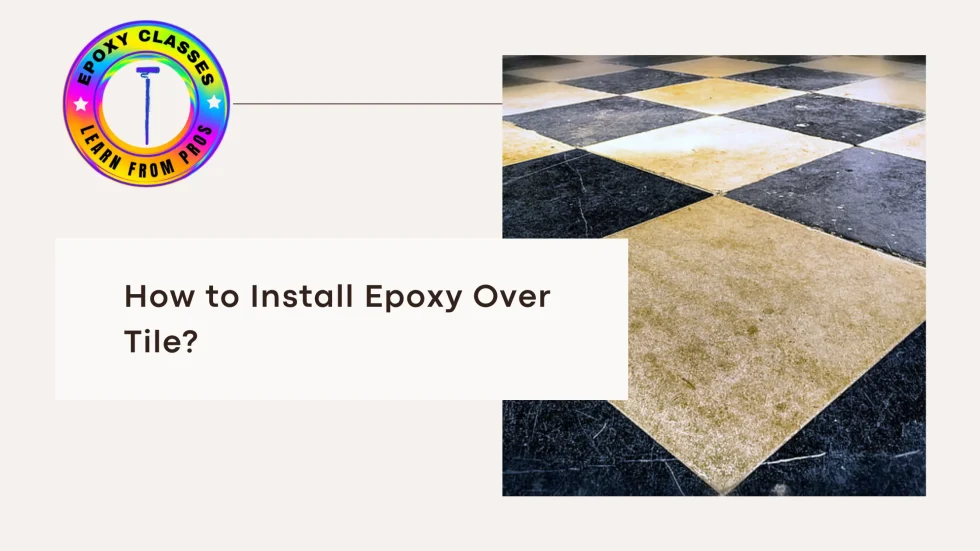
How to Install Epoxy Over Tile?

Epoxy floor coatings are becoming increasingly popular due to their durability, aesthetic appeal, and adaptability. Whether you’re upgrading your home’s interior or sprucing up your outdoor space, applying epoxy over tiles is a cost-efficient and practical solution. However, achieving a flawless finish requires careful preparation and execution. This guide will take you through the process step by step, answering common questions like “Can you epoxy over tile?” and sharing tips for ensuring proper adhesion and longevity. Why Choose Epoxy Over Tile? Epoxy flooring provides several benefits: At Epoxy Classes NY, we provide comprehensive training to help you feel confident in applying epoxy to tiles and other surfaces. Step-by-Step Guide to Applying Epoxy Over Tile Step 1: Inspect Your Tile Floor Check the condition of your tiles for cracks or loose pieces. Address any damage before moving forward, as imperfections can impact the final result. Step 2: Prepare the Surface Proper preparation is essential: Step 3: Apply a Primer If sanding isn’t feasible, use a high-quality primer to help the epoxy bond effectively with the tiles. Step 4: Mix and Apply Epoxy Follow the manufacturer’s guidelines when mixing epoxy resin and hardener. Step 5: Cure the Epoxy Allow the epoxy to cure as per the product’s instructions, typically 24–48 hours, before stepping on it. Proper curing ensures durability and longevity. FAQs About Installing Epoxy Over Tile Benefits of Learning Epoxy Application At Epoxy Classes NY, we empower individuals to master epoxy flooring techniques. Whether you’re a DIY enthusiast or aspiring professional, our weekend classes equip you with the skills to create stunning results on tiles and other surfaces. Contact Us Today Call us at 631-305-1035 or email newyorkepoxy@gmail.com to enroll in our next class. Transform your space with epoxy floor coatings that offer a sleek, durable finish. By learning and applying these skills, you open the door to endless possibilities for both personal and professional projects.

Can You Paint an Already Decorated Ornament with Epoxy Resin
Blog

Can You Paint an Already Decorated Ornament with Epoxy Resin?

Transforming ornaments adds a creative, joyful touch to your home for the holidays. Want to give your masterpiece a glossy, protective finish? You can use epoxy resin. But there are important things to consider first. We’ll guide you through applying epoxy resin to your decorated creations. At each step, you’ll find essential dos and don’ts. Plus, learn how to turn a plushie into a stunning ornament with resin magic. For expert epoxy resin training, visit Epoxy Classes NY. They offer tips and hands-on workshops to help you master resin application. What Is Epoxy Resin and Why Use It on Ornaments? Epoxy resin is a powerhouse in crafting. When mixed, its two parts form a clear, durable finish. Artists and crafters appreciate its versatility. They use it to coat surfaces, make jewelry, and preserve artwork. When you apply epoxy resin to ornaments, you can: Can You Apply Epoxy Resin to an Already Decorated Ornament? Yes, you can apply epoxy resin to a decorated ornament. But, you must ensure: Step-by-Step Guide to Coating a Decorated Ornament with Epoxy Resin Materials Needed: Step 1: Prepare the Ornament If your ornament sparkles, add a light coat of acrylic sealer. This protects the vibrant details from smudging under the resin. Let it dry completely. Then your masterpiece will shine. Step 2: Mix the Epoxy Resin First, blend equal parts of resin and hardener in a disposable cup. Then, stir gently for 2 to 3 minutes until they mix well. Be careful not to stir too quickly; this can create annoying air bubbles! Step 3: Apply the Resin Step 4: Remove Bubbles Bubbles may form in the resin. To remove them: Step 5: Let It Cure Place the ornament on a drying rack where it can cure undisturbed for 24-48 hours. Keep it in a dust-free environment. Once fully hardened, it will have a glass-like finish. How to Make a Plushie into an Ornament Turning a plushie into an ornament is a creative, sentimental way to preserve a favorite toy. Here’s how you can do it: Materials Needed: Step 1: Prepare the Plushie Step 2: Apply Epoxy Resin Step 3: Let It Cure Common Mistakes to Avoid When Using Epoxy Resin on Ornaments OSHA Guidelines for Safe Epoxy Handling Epoxy resin work exposes you to hazardous chemicals. So, follow OSHA safety standards. These guidelines help prevent skin irritation, breathing issues, and chemical burns. For safety, wear gloves and masks. Work in a ventilated area. This is essential for coating ornaments or making resin art. Final Thoughts Coat your decorated ornaments in epoxy resin for a dazzling upgrade. This magical layer seals in beauty and boosts durability. Say goodbye to dull finishes! You can preserve cherished decorations or transform a beloved plushie into something new. Now that you know, why not give it a try? Unleash your creativity! Turn plain into spectacular with high-gloss ornaments. They’ll sparkle for years, becoming timeless treasures. Check out Epoxy Classes NY for expert epoxy resin training, tips, and hands-on workshops to master the art of resin application! FAQs Can I use epoxy resin on glass ornaments? Yes, epoxy resin works well on glass, but ensure the surface is clean and dry before application. Will epoxy resin yellow over time? High-quality, UV-resistant epoxy resins are less likely to yellow. Store your ornaments away from direct sunlight to prolong their clarity. Can I add glitter to the resin for extra sparkle? Absolutely! You can mix fine glitter into the resin before applying it to give your ornament a dazzling effect. How do I fix an uneven resin coating? You can lightly sand the cured resin and apply another thin layer for a smoother finish. Can I use epoxy resin on fabric plushies? Yes, but using Mod Podge or fabric stiffener first helps. It makes the plushie hold its shape before coating it with resin.

How to Remove Epoxy from Concrete
Blog

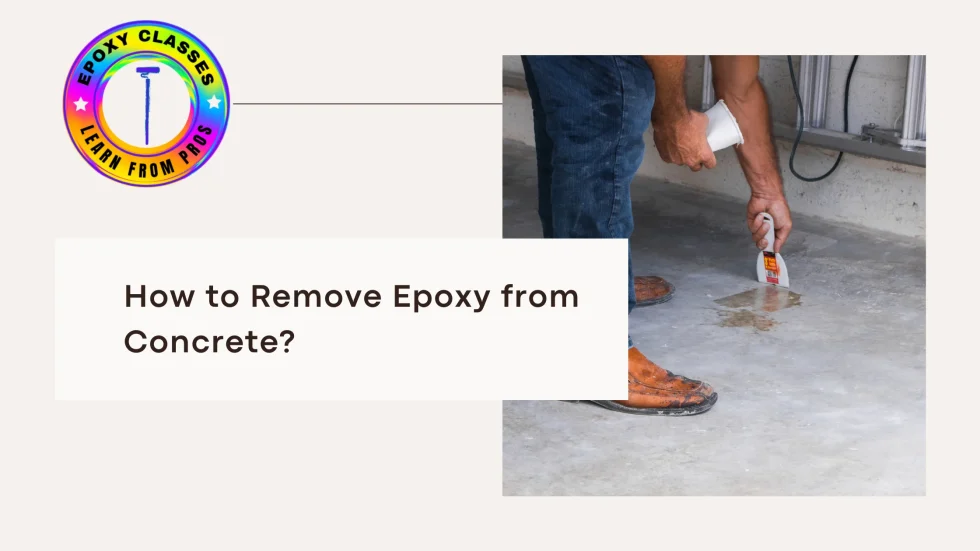
How to Remove Epoxy from Concrete?

1. Mechanical Removal (Grinding or Sanding) For heavily cured or thick epoxy layers, mechanical removal is often the most effective method. 2. Solvent-Based Methods Solvents work by softening the epoxy, making it easier to scrape off. 3. Heat Application Using heat is another way to remove hardened epoxy from concrete and other surfaces. 4. Chemical Paint Strippers Epoxy-specific paint strippers can be highly effective in dissolving cured epoxy. 5. Power Washing For thin or slightly worn epoxy coatings, a high-pressure power washer can help lift the coating. Tips for Removing Epoxy from Other Surfaces Removing Epoxy from Metal Epoxy removal on metal surfaces, like stainless steel, requires special care: How to Remove Epoxy from Plastic Removing epoxy from plastic can be tricky because plastic is more susceptible to damage: Removing Epoxy from Wood For epoxy spills between wood, solvents or heat work well: FAQs: How to Remove Epoxy from Concrete 1. How do you remove dried epoxy from concrete? The most effective methods for removing dried epoxy from concrete include mechanical grinding, heat application, or chemical solvents. A combination of these methods often works best. 2. Can I dissolve cured epoxy completely? Solvents like acetone or paint strippers can soften epoxy but rarely dissolve it entirely. After softening, use mechanical scraping or sanding to complete the removal. 3. What is the best way to clean up epoxy spills on concrete? For fresh spills, acetone or isopropyl alcohol can help dissolve epoxy before it hardens. For cured spills, use heat or a grinder to remove it from the concrete surface. 4. How can I remove epoxy from stainless steel or metal surfaces? Heat or solvent applications can help soften epoxy on stainless steel. Be sure to use a plastic scraper to prevent scratching the metal surface. 5. How do I remove hardened epoxy from plastic? Use isopropyl alcohol or acetone in small amounts to soften the epoxy without damaging the plastic. Avoid excessive force when scraping. Removing epoxy from concrete or any other surface can be challenging, but with the right approach, you can restore your surface to its original condition. For those looking to deepen their understanding of epoxy applications, Epoxy Classes NY offers hands-on training on everything from epoxy removal to professional installation. Join our next weekend course to gain certification as an epoxy installer! Contact us at 631-305-1035 or email newyorkepoxy@gmail.com for more information.

Blog

Will Epoxy Adhere to Smooth Metal​?

Epoxy is a strong adhesive. It works well but will epoxy adhere to smooth metal​? The answer is yes—with the right preparation! Proper surface prep is key. It ensures a strong bond. This applies to epoxy paint for metal, two part epoxy resin, and surface sealing. If you’re looking to master epoxy applications, Epoxy Classes NY offers expert-led training. Learn the best techniques for bonding metal, creating stunning resin art, and more! How Epoxy Works on Metal Epoxy forms a strong bond, curing into a tough surface. Metal is non-porous, unlike other materials. With the right surface prep, epoxy sticks well. Moisture, cleanliness, and texture are key for a good hold before gluing metal. Preparing Metal for Epoxy Adhesion 1.Cleaning the Surface Dust, grease, and oil break bonds in epoxy. Clean them off with acetone or a strong degreaser. Once the metal is shiny, apply your 2-part epoxy paint or resin. Then, watch the bonding magic happen! 2.Sanding for Better Grip Smooth metal surfaces need slight roughening to allow epoxy to grip. Use sandpaper or a wire brush to create a slightly textured surface. This enhances bonding strength and ensures durability. 3.Removing Moisture Moisture is the enemy. It disrupts the bond between epoxy and metal. Make sure surfaces are completely dry before applying the resin. This ensures the best results. Best Epoxy Types for Metal 1.Two Part Epoxy Resin A two part epoxy resin consists of resin and hardener. When mixed, they create a strong, durable bond. This mix is often used for structural applications and metal coatings. 2. 2 Part Epoxy Paint For metal surfaces facing the elements, a 2 part epoxy paint is the best choice. It is tough and resists chemicals while lasting for years. 3. Liquid Shimming for Metal Repairs Liquid shimming is the magic behind epoxy. It fills gaps between metal surfaces, creating a strong bond. This technique adds structural support, making it a game-changer for industrial applications. Using Epoxy for Various Applications 1.Finishing Wood with Epoxy Resin Epoxy isn’t just for metals it works wonders on wood, too. This resin seeps into your projects, leaving a glossy, waterproof finish. Perfect for tables and countertops, it turns art into stunning masterpieces. 2.Epoxy Resin in Art Artist’s love working with epoxy for its versatility. Epoxy resin in art lets creators make stunning, colorful resin works. These include paintings, jewelry, and sculptures with unique designs. 3.Marine Epoxy for Boat Repairs Epoxy is a hidden gem in boat maintenance. This amazing adhesive restores rotted wood, giving your vessel new life. It adds strength and acts like armor, protecting against future damage. Understanding Epoxy’s Performance Epoxy Resin Glass Transition Temperature The glass transition temperature of epoxy resin is important. It shows when epoxy starts to soften when heated. For metal applications, choose a high Tg epoxy. It remains strong in extreme temperatures. Can You Use Nitrile Gloves with Resin? Yes! If you’re working with epoxy, you may wonder: Can you use nitrile gloves with resin? Yes. Nitrile gloves protect your hands from resin. They are a safe barrier against exposure. Learn Epoxy Application Like a Pro! Ready to explore epoxy? At Epoxy Classes NY, we offer hands-on training. It turns beginners into skilled artisans. Whether your medium is metal, wood, or art, our classes give you the key skills. Learn prep work, application, and finishing from the experts. Unleash your creativity and create masterpieces! OSHA Guidelines for Safe Epoxy Use on Metal Using epoxy paint or two-part resin is an art form. It’s not a gamble. Safety is essential! OSHA suggests wearing protective gear for protection. Good ventilation is crucial; it keeps the workspace safe. Avoid moisture before gluing metal. Wetness can weaken adhesion. These steps help prevent harmful fumes and skin irritation. Follow these guidelines for a safe and successful epoxy project. Conclusion- Will Epoxy Adhere to Smooth Metal? Epoxy bonds strongly to smooth metal. But preparation is key. Clean, sand, and dry the surface first. Then, apply the two part epoxy resin or epoxy paint. This versatile material is reliable for any project. Use it to seal a boat, create resin art, or give wood a beautiful finish. For expert guidance, enroll in Epoxy Classes NY and take your epoxy skills to the next level! FAQs About Epoxy Adhesion on Metal Can epoxy adhere to smooth metal without sanding? Epoxy can bond to metal. But sanding improves adhesion by creating a textured surface. Without sanding, two part epoxy resin or 2 part epoxy paint may not grip well, leading to weak bonds. How do I prepare metal before applying epoxy? Ensure the surface is clean, free from grease, and completely dry. Any moisture before glueing metal can weaken the bond. Light sanding helps epoxy adhere better for long-lasting durability. What type of epoxy works best for metal surfaces? For strong adhesion, use two part epoxy resin to bond metal. For protection, use epoxy paint for metal. Liquid shimming is useful for filling gaps between metal components. Can I use epoxy resin for art on metal surfaces? Yes! Epoxy resin in art works beautifully on metal when properly prepped. Artists often paint metal canvases or make metallic resin jewelry. This creates a stunning look. Can I wear nitrile gloves when working with epoxy? Yes, Nitrile gloves are safe. They protect your hands from epoxy. So, they are preferred for resin work.

Hands-on epoxy flooring training in Johnstown, NY. Learn real skills, build a real business, and create floors that last.

TRAINING

Copyright © 2026 – Epoxy Classes NY

Scroll to Top